
Voice channels are one of the coolest features of Discord. When you hear “voice channel,” you might think of the classic WhatsApp or Telegram calls. And if you’re a communication app veteran, you might even think about TeamSpeak or Curse calls. However, voice channels on Discord are nothing like them.
Discord voice channels allow you to do much more than just talk. You can play games, stream, turn the call into video calls, and much more.
In this guide, we’re going to take a look at what Discord channels are, what a voice channel is, how you can create them, and their settings.
What are Discord Channels?
You can think of Discord channels as different rooms of a local club.
In the “Writing Room,” you can communicate with other members using only a pen and paper, which would be the “text channels” of Discord, where users communicate with each other using text messages.
In the “Speaking Room,” you can only speak - no writing allowed, which would be the “voice channels” of Discord.
In the “Conference Room,” only the members with permission can talk, which would be the “stage channels” of Discord. Of course, these are very superficial examples. You can do much more than just text and talk on Discord channels.
The thing that separates Discord from other social instant messaging apps is the concept of servers and channels. You can think of servers as your regular old group chats, but that’s where channels come in. Unlike other apps, Discord has a sub-group chat, called channels, within servers that allow users to switch between them and talk about the channel’s topic.
They sound great, so let’s take a look at what a voice channel is.
What is a Discord Voice Channel?
A voice channel is a type of channel that has a pretty self-explanatory name. In voice channels, users can talk to each other using their microphones, and they can even turn their cameras on if they want to make a video call. Think of them as WhatsApp or Telegram calls but much, much more advanced.
Voice channels are the second most used channel type in Discord, and text channels are in first place. Users can turn their microphones (others won’t hear you) and headsets (you won’t hear others) off any time they want. Same with cameras, screen shares, noise reduction settings, built-in Discord games, and more.
Voice channels have settings like age restriction, bitrate (audio quality), video quality, user limit, regions (server regions), permissions, and more. We will get into the details of voice channel settings later in the guide.
Alright - now you know what a voice channel is. So, let’s see how you can actually create a voice channel for your server.
Creating a Voice Channel on Discord
Creating a Discord channel is very easy to do in both desktop and mobile versions of the app. But before moving on to creating a voice channel, let’s remember that in order to create a channel (voice or not, doesn’t matter) on a Discord server, you need to have the Manage Channels permission. If you’re the owner of the server, meaning that you’ve created it or the person who did transferred the ownership to you, you already have all the permissions.
Now, let’s start by looking at how you can create a voice channel on a desktop.
How to Create a Discord Text Channel on Desktop
There are only four steps to creating a voice channel on a desktop. While there are many ways to create a channel on Discord, we’re going to take a look at the context menu method. If you want to learn all the ways of creating channels, check out our What are Discord Channels and How Do You Create Them? Guide. Let’s move on to the steps:
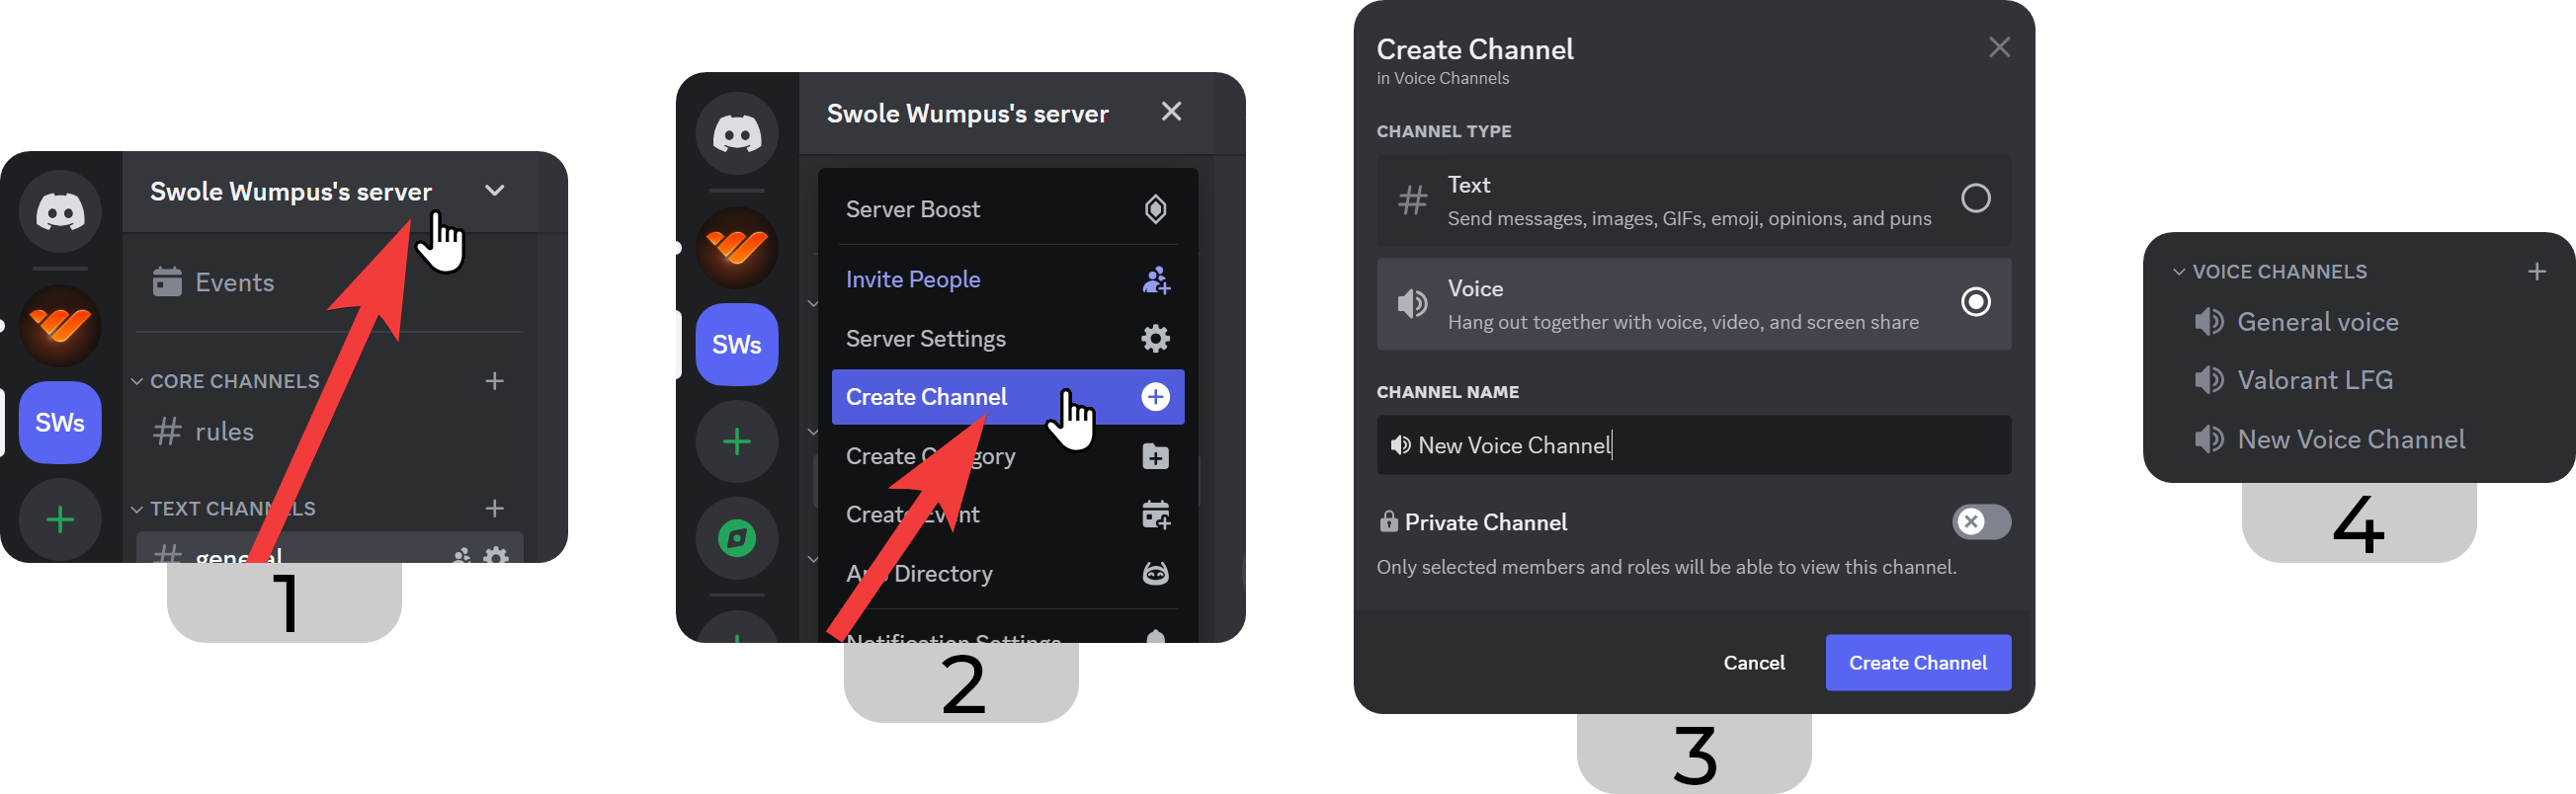
- First, click the server name to open the server context menu.
- In the context menu, select the Create Channel option. This will display a new window.
- In the Create Channel window, select Voice in the channel type options and give your channel a cool name. For this guide, we’ve named ours New Voice Channel. Once you’re done, click the Create Channel button at the bottom right.
- And that’s it - you just created a voice channel.
How to Create a Discord Text Channel on Mobile
Just like the desktop process, creating a voice channel on the mobile version of Discord takes just four steps. You can follow the steps below no matter which mobile operating system you use:
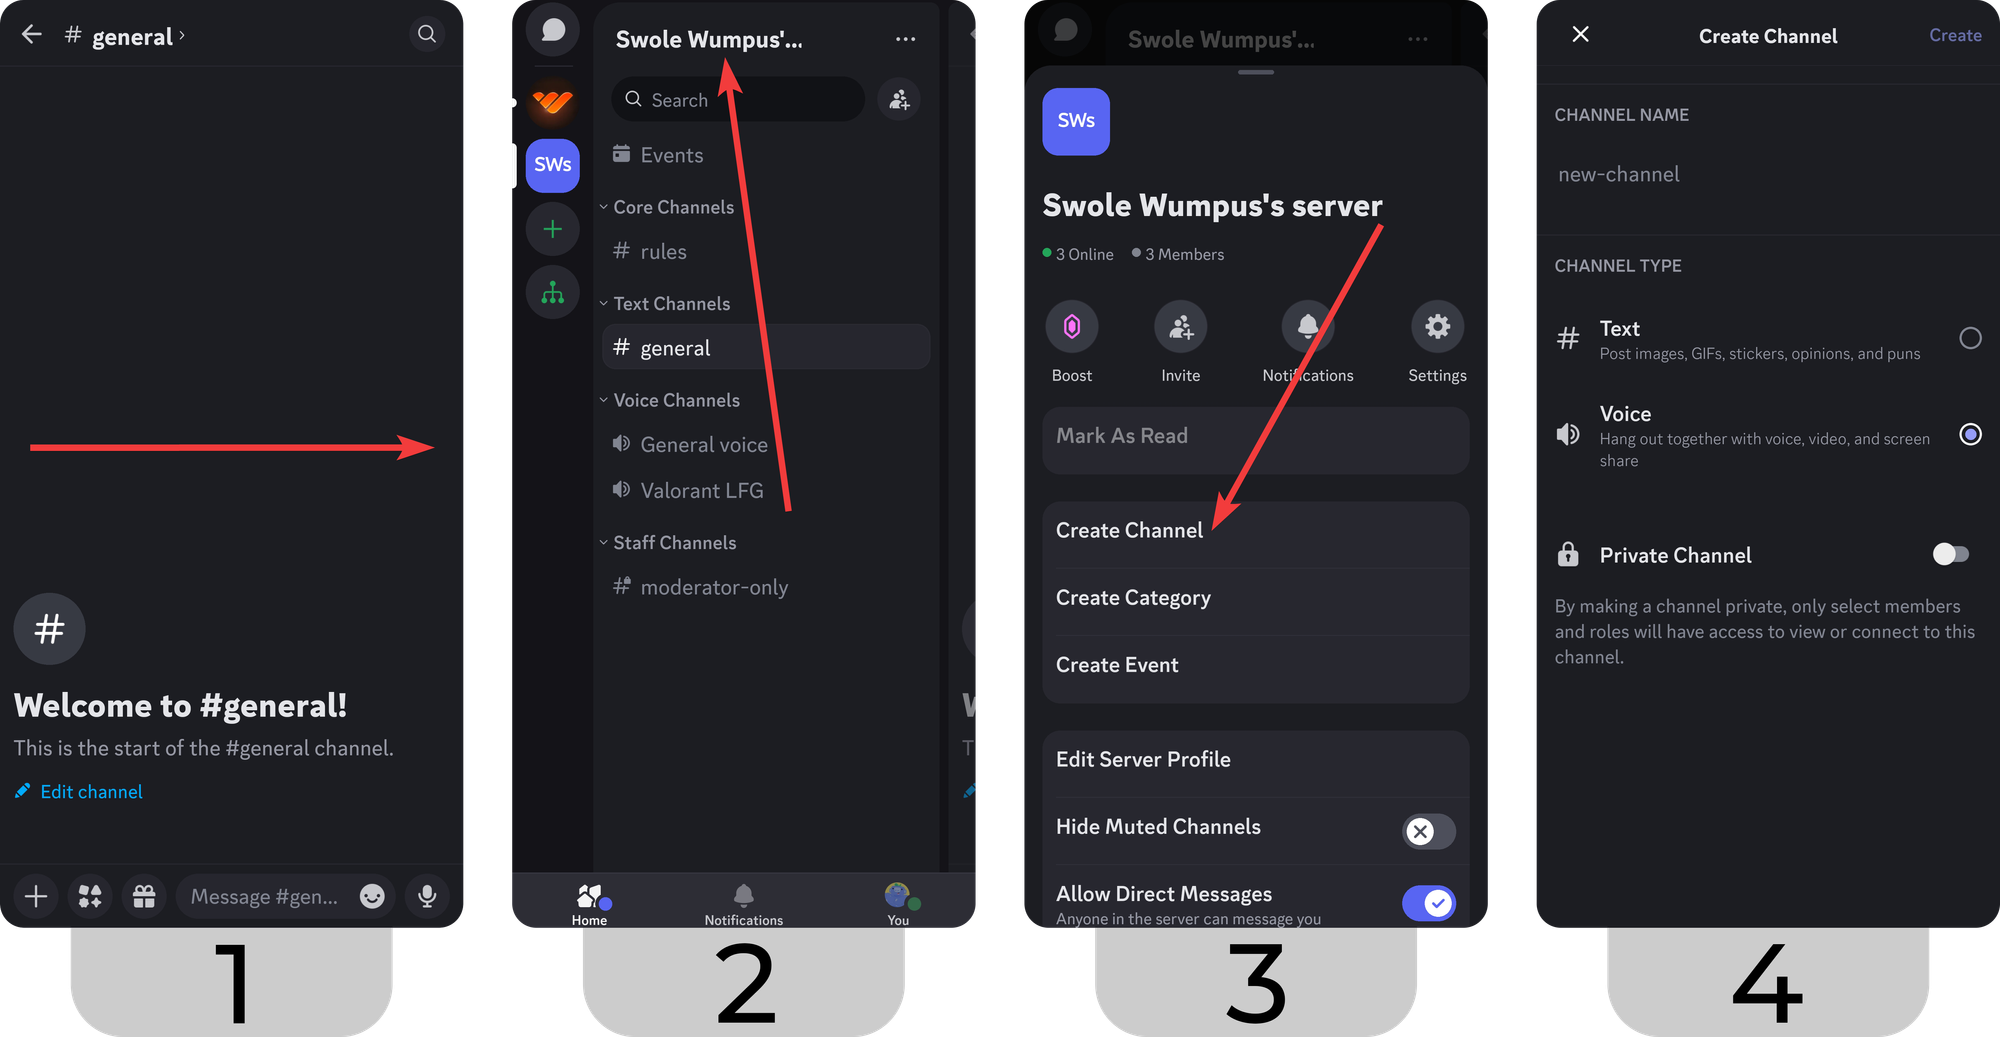
- In the channel view, swipe right to open the channel list. If you’re already in the channel list, skip this step.
- In the channel list, press the server name at the top of your channel list to open the server context menu.
- In the server context menu, press the Create Channel button to open the channel creation window.
- In the channel creation window, give your channel a name and select the Voice from the channel type options. Once you’re done, press the Create button at the top right of your screen.
Discord Voice Channel Settings
Just like all channel types on Discord, the voice channels have their own settings as well. All channels on Discord have four setting sections: Overview, Permissions, Invites, and Integrations.
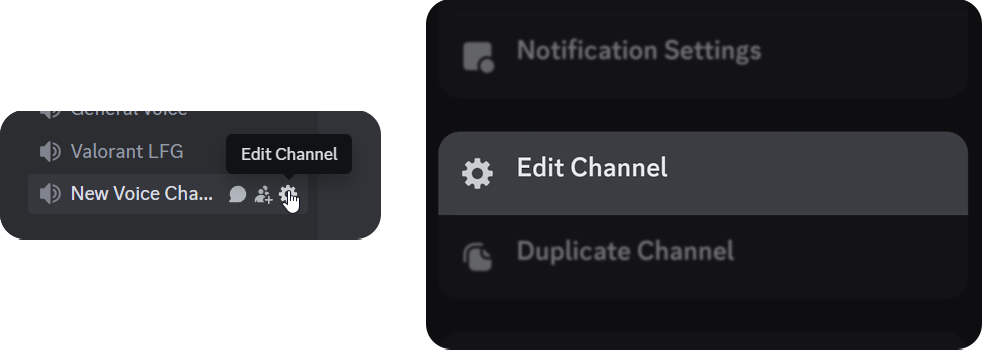
If you’re on the desktop version of Discord, you can access the channel setting by clicking on the Edit Channel button (cogwheel icon) that appears when you hover over a channel. If you’re on the mobile version, you should press and hold on to a voice channel and select the Edit Channel option from the context menu.
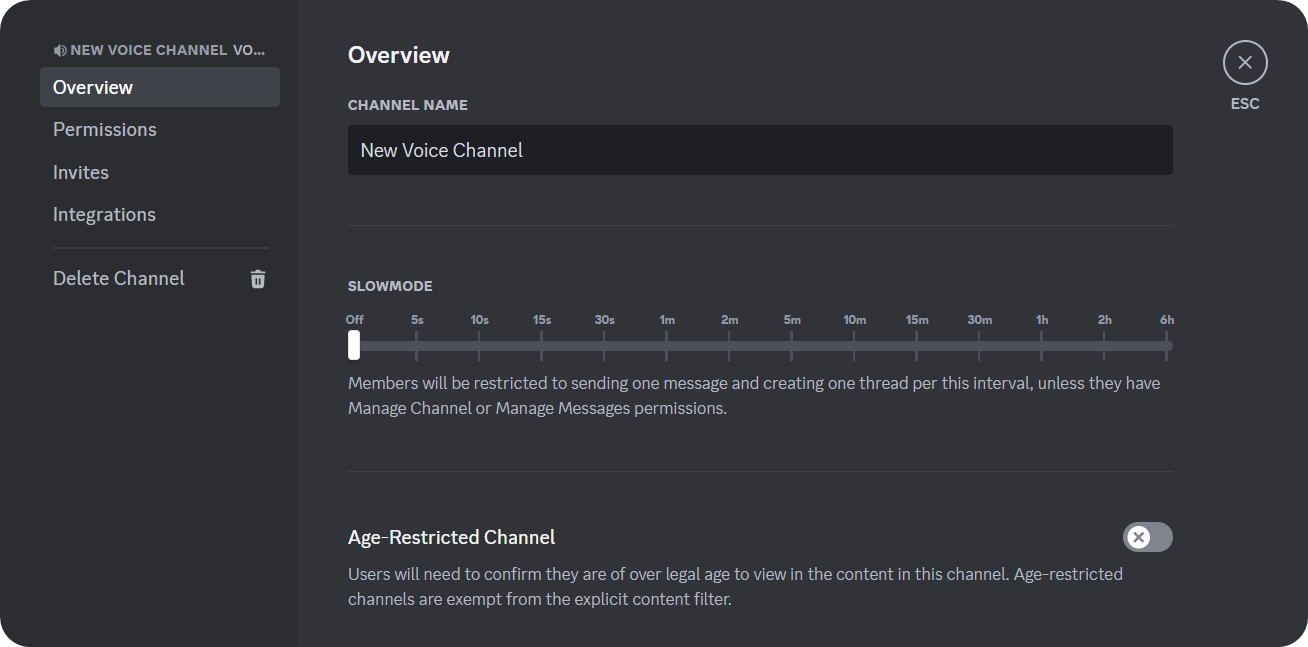
Channel Settings Overview
In the overview section of the channel settings, you have seven settings in total:
- Channel Name - This setting allows you to change your channel name any time you want.
- Slowmode - This setting allows you to force a cooldown on the user’s messages on the built-in text channel of the voice channel (which can be accessed by hovering over the voice channel and clicking on the speech bubble icon).
- Age-Restricted Channel - This setting allows you to mark your channel as age-restricted, which means users who are younger than 18 (according to their Discord account) won’t be able to access the channel.
- Bitrate - This setting allows you to change the voice channel’s bitrate from 8 to 96 kbps (can be up to 384 kbps with Level 3 Server Boost). This will determine the audio quality of the voice channel - the higher the bitrate, the better the sound quality. Keep in mind that increasing the bitrate of the voice channel might affect the connection of some users - 64 kbps is a very reasonable quality, so you might want to keep that.
- Video Quality - This setting determines the video quality (camera) of the users in the voice channel. Setting it to 720p will lock everyone’s camera quality at that - selecting the Auto option will let Discord determine itself.
- User Limit - This setting determines how many users are allowed to be in the voice channel at any given time. It can be infinite to 99 - this is a great way to create private voice channels with a limit of 2, 3, or 4 users.
- Region Override - This setting will determine which audio server the users will be forced to connect to. If you’re living in Europe, it’s best to select Rotterdam from the list. If you’re in Japan, select Japan. If you have members from all over the world, however, you should leave the setting at Automatic.

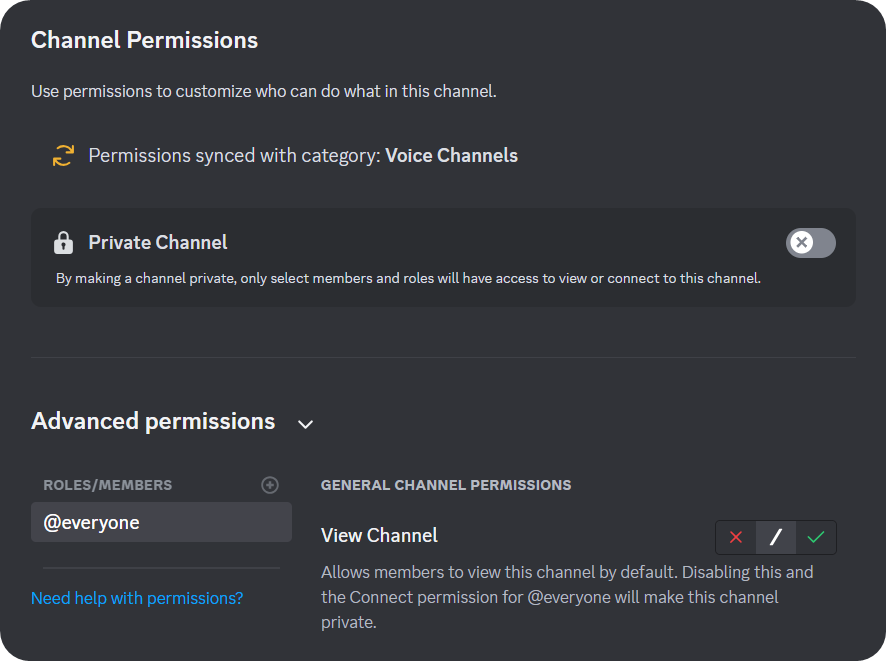
Channel Permissions
You might’ve heard the word “permissions” being used in Discord before. Generally, it means the permissions of a role, like Send Messages or Ban Users. The permissions section of the voice channel settings allows you to customize permissions as well, but it’s channel-specific. This means that even if a role has the Connect permission, which allows users to connect to voice channels, you can set that role’s permission in this section to disable that.
Clicking the plus icon next to the Roles/Members under the Advanced permissions section will allow you to add specific roles and members and assign them permissions for this voice channel only.
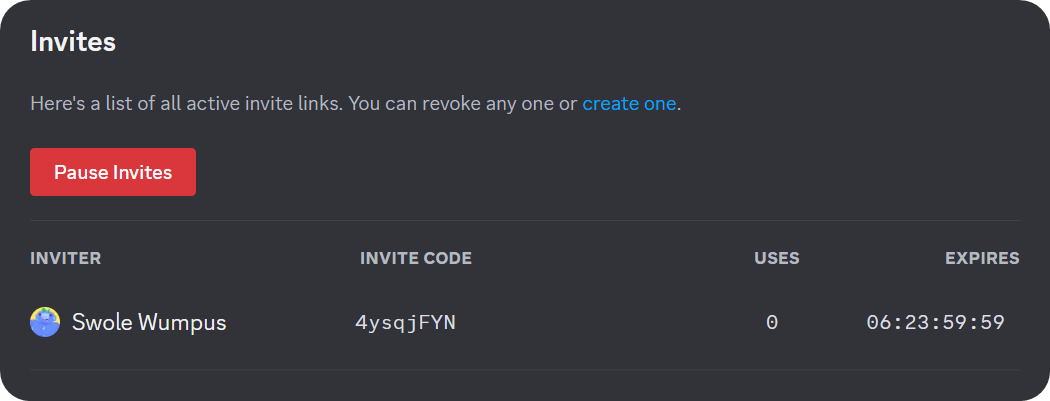
Discord Channel Invites
The third section in the voice channel settings is the invites. In the invites section, you can see all the invites that were created specifically for the channel in question. Now, you might know that the most common way to join a server is using invites. But in this case, we’re talking about channel invites. Channel invites will force users to join a specific channel, and they can be created by the context menus (right-click on desktop and press and hold on mobile) of the channels.
If you want to delete an invite, making it unusable, you can do so by hovering over the invite and pressing the “X” icon that will appear. You can also use the red Pause Invites button to temporarily disable all invites of the channel.
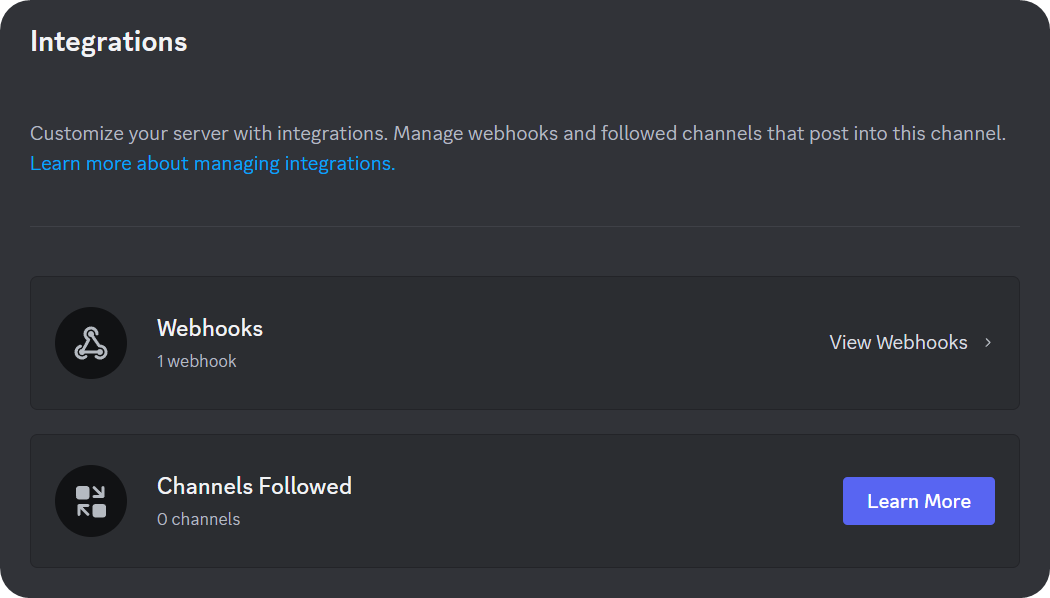
Discord Channel Integrations
As you might know, Discord introduced text channels within voice channels in June 2022. It’s a self-explanatory feature: voice channels now have text channels in them that can be accessed by clicking the speech bubble on voice channels. Discord introduced this so even if you don't have a mic, you can still hang out in the voice channel. Plus, it's a great space to post links to what you're talking about (if the server allows that).
In the integrations section, you can create webhooks that will send messages into the text channel. Check out our How to Create Discord Webhooks and How to Use Discord Webhooks guides.
Deleting a Discord Voice Channel
If you’ve accidentally created a voice channel or you don’t want to have the voice channel on your server anymore, you can easily delete it. Of course, you need to have the Manage Channels permission to do this.
Now, before learning how to delete a channel, you need to know that deleting a channel is irreversible and that you can’t make backups of channels. Once you delete one, all its contents will be gone. You will have to create a new one.
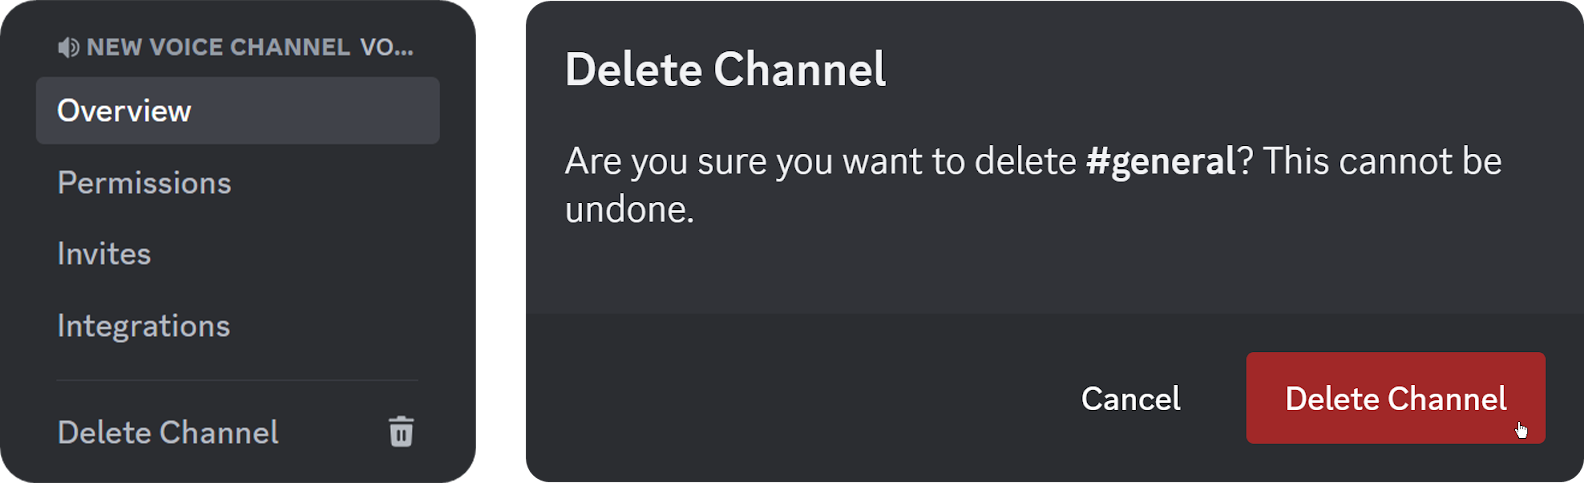
Go to the voice channel’s settings and look at the bottom of the sections. There, you will see the Delete Channel button. Clicking it will display a confirmation message, which will have a Delete Channel button again. Click it to delete the channel.
Level Up Your Discord Server with Whop
Now you know what voice channels are - amazing! Since you’re here, learning about Discord, chances are you have a Discord server of your own. Did you know that thousands of people have been making money from their Discord servers with the help of Whop?
Singing up to Whop and starting selling access to your server or its roles takes less than 10 minutes. Sign up today and be a part of the winning team.


![How to Leave a Discord Server [Desktop & Mobile]](/blog/content/images/size/w600/2024/06/How-to-Leave-a-Discord-Server.webp)
