These days, more and more organizations are focusing on remote work and studies. As a result, online courses have become one of the most in-demand education types.
Have you ever wanted to create a course about a topic you’re good at and have dreamed of earning money from? It's time to make it a reality – and you won’t believe how easy it is to do.
In this guide, we’re going to take a look at Whop apps, what the courses app is, how you can set it up, and every single thing you can do with once you're in.
What are Whop Apps?
Apps can be added to your Whop to help build your business. There are more than 20 apps that Whop owners can utilize, and each has unique features. You can think of apps as modules on your Whop that you can add, swap and remove at will. While some apps make way for communication between members, others allow you to connect external platforms like websites or Telegram to your whop.
Adding an app to your whop is free, and you can add or remove it at any time. As of June 2024, the top 5 most popular apps on Whop are:
- Courses - Create courses for your members.
- Chat - Chat rooms for your Whop members to talk to each other.
- Content - Share documents with your members.
- Files - Share images, documents, apps, and all kinds of files.
- Affiliate Links - Share custom affiliate links for your members.
Now, let’s take a look at the most popular app: Courses.
What is the Courses App?
For a very long time, many people have been learning new skills and educating themselves on topics using online courses. However, when it comes to creating courses, it’s not as simple creating a website, uploading the videos, and starting to earn money. Most online course platforms require sellers to go through a long process when creating the course.
Luckily for you, this isn’t the case for Whop.
The Courses app on Whop allows you to create a comprehensive course in a matter of minutes – if you have the content ready, of course. One of the best features of the Courses app is that you can add six types of lessons to your course:
- Multimedia: Upload rich text, video, and files.
- Text: Upload rich text content.
- Video: Upload video content.
- PDF: Upload PDF files.
- Knowledge Check: Add a quiz for your members with no final grade.
- Quiz: Add a quiz for your members with a grade and a completion requirement.
The Courses app sounds great, but how do you exactly add it to your whop? Let’s see.
How to Add the Courses App to Your whop
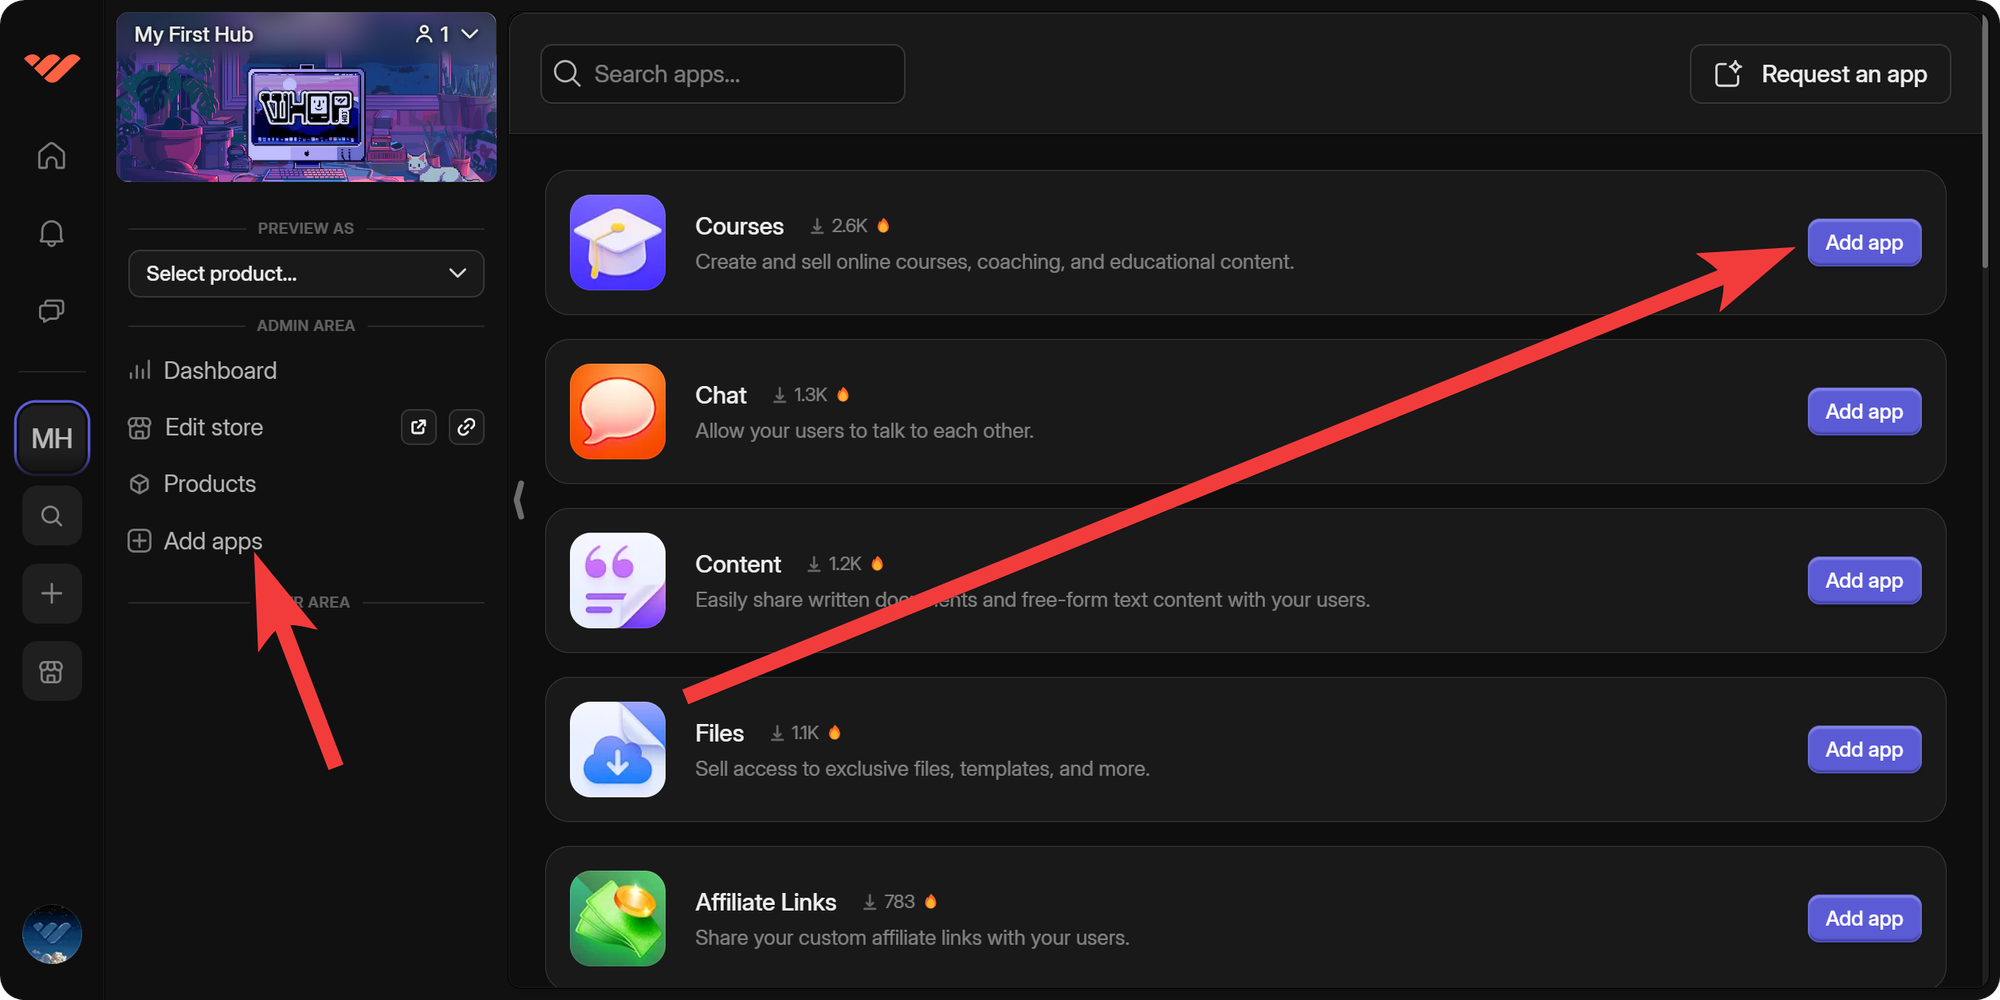
The first step is to navigate to the 'Add apps' section of your whop. Once you click this button, you’ll be directed to a list of all available apps. There, you’ll see the Courses app – it’s currently the most used app in Whop, so it’s at the top. Click the 'Add app' button next to the Courses app to add it to your whop.
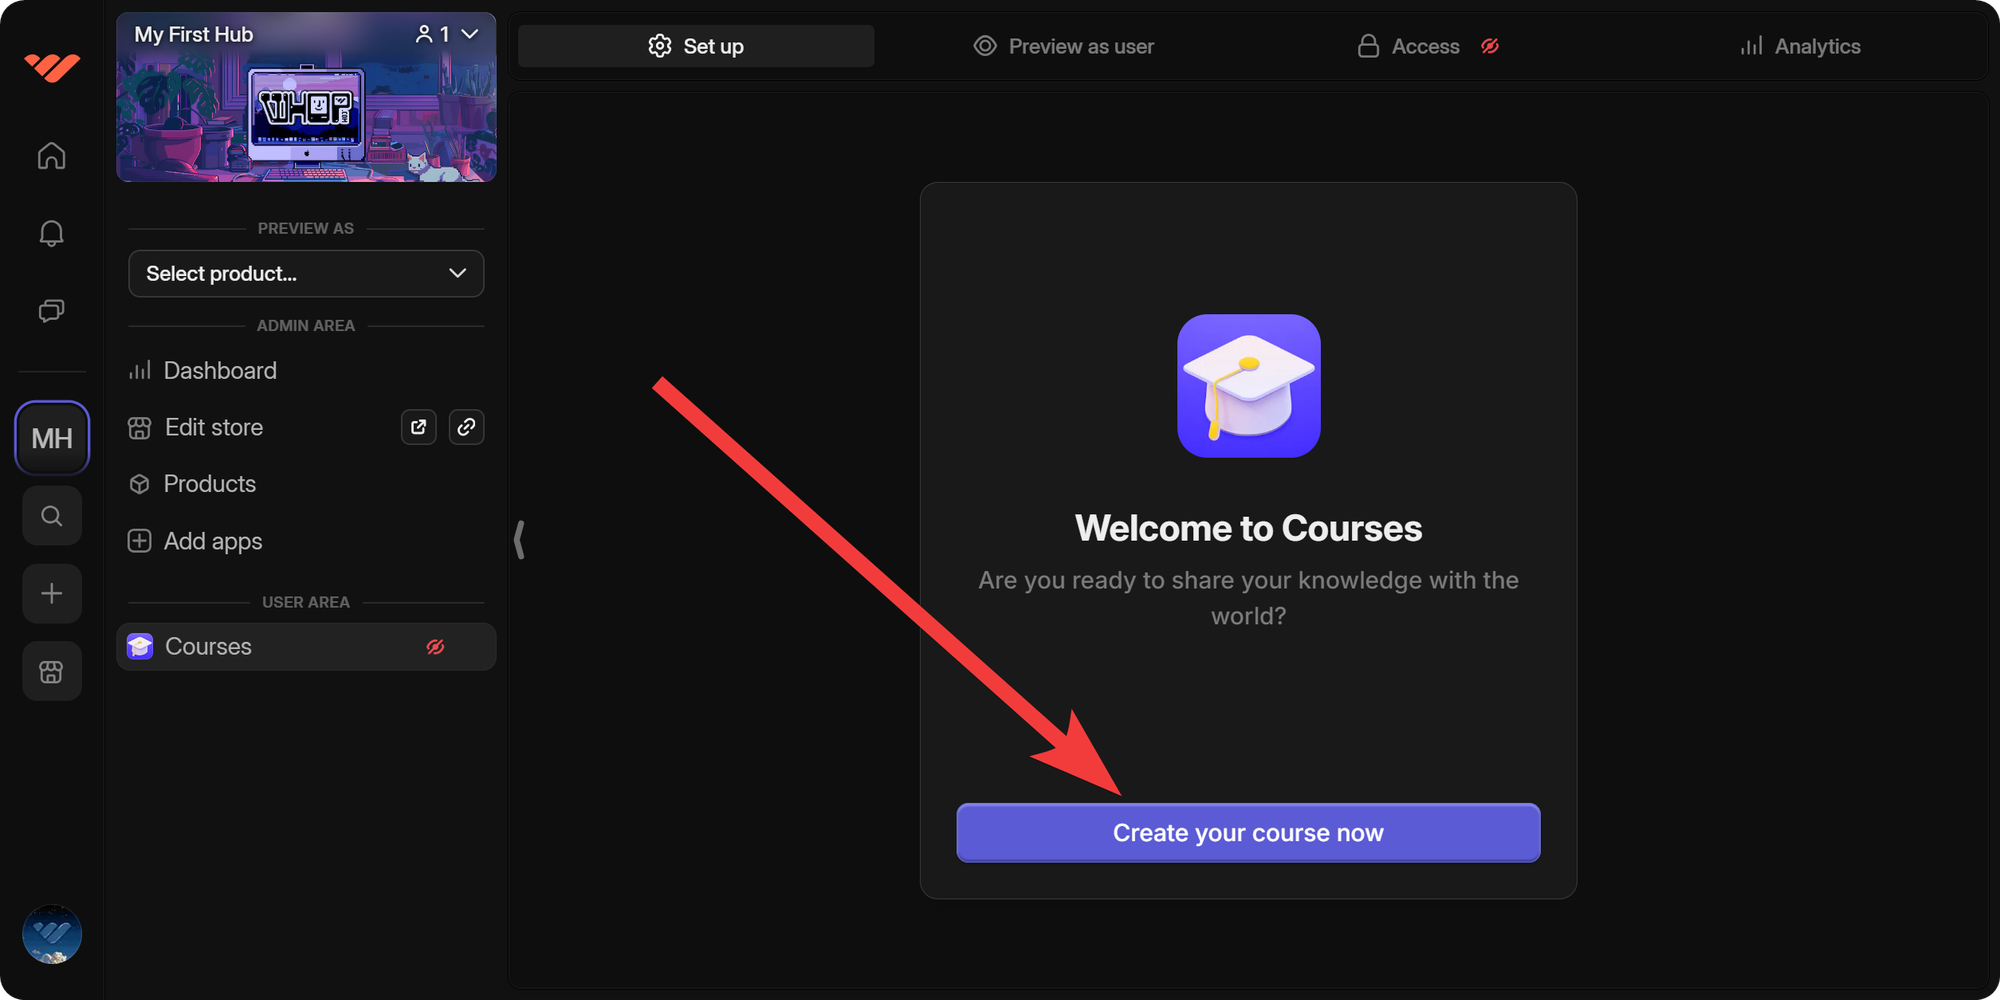
Next, you’ll be automatically directed through the process of setting up the Courses app. The first step is a welcome message with the “Create your course now” button. Click it to proceed.
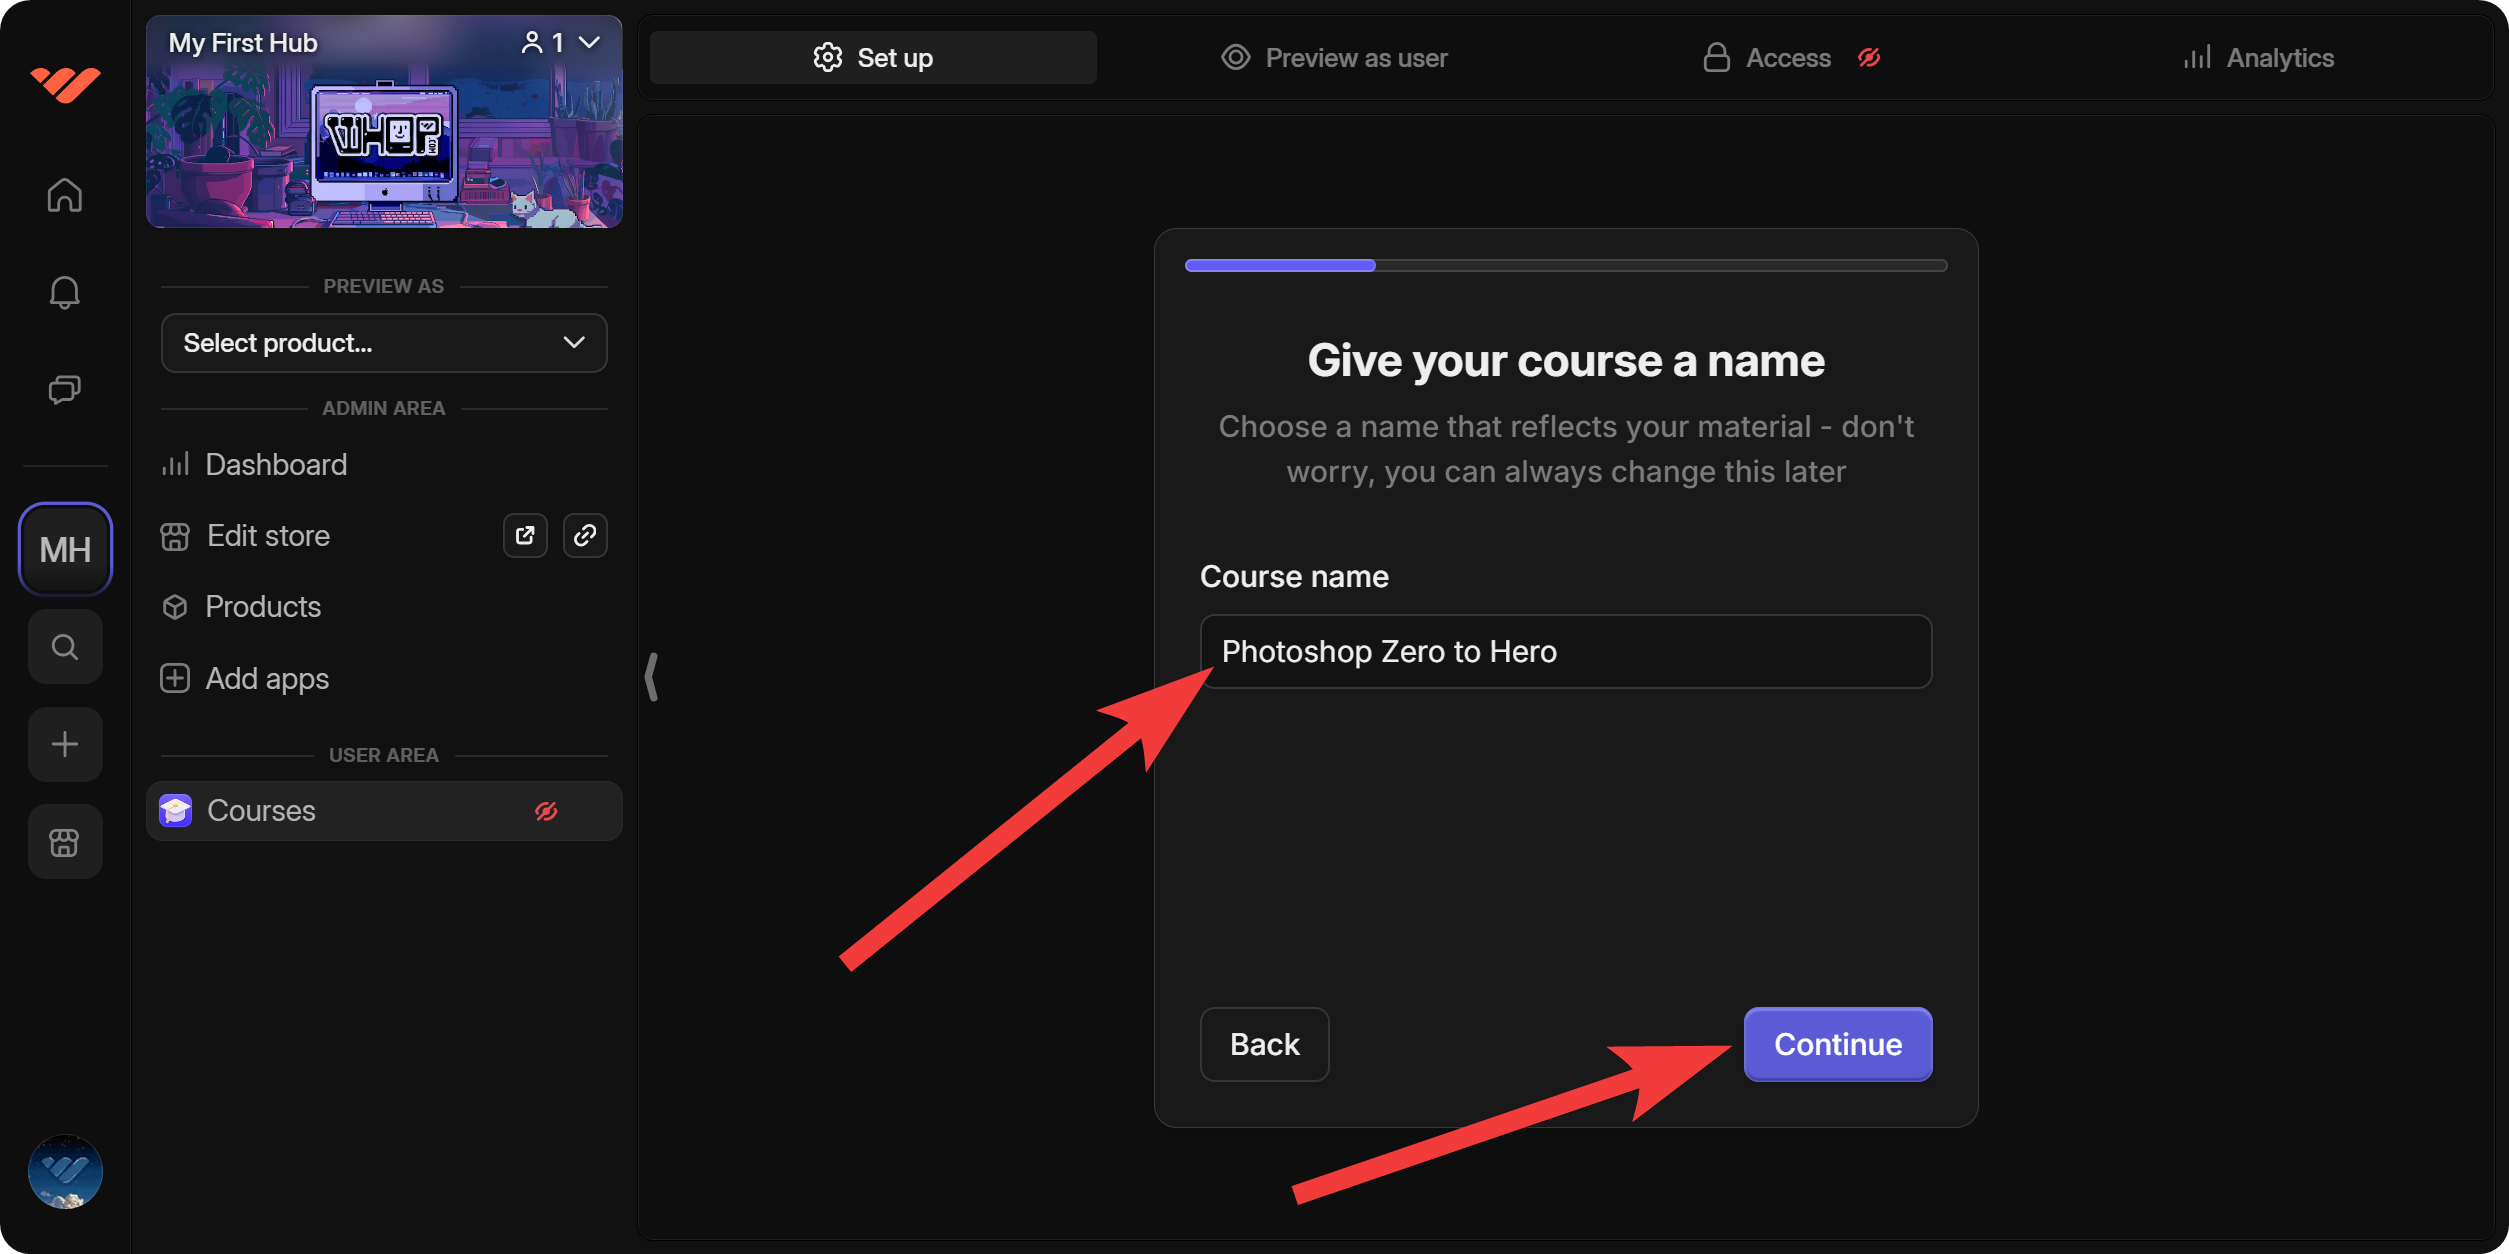
In the second step, you’ll be prompted to give your course a name. You can change the name of the course any time you want, so don’t stress if you can’t think of a cool name for it right away. After you decide on a name, click the 'Continue' button to proceed.
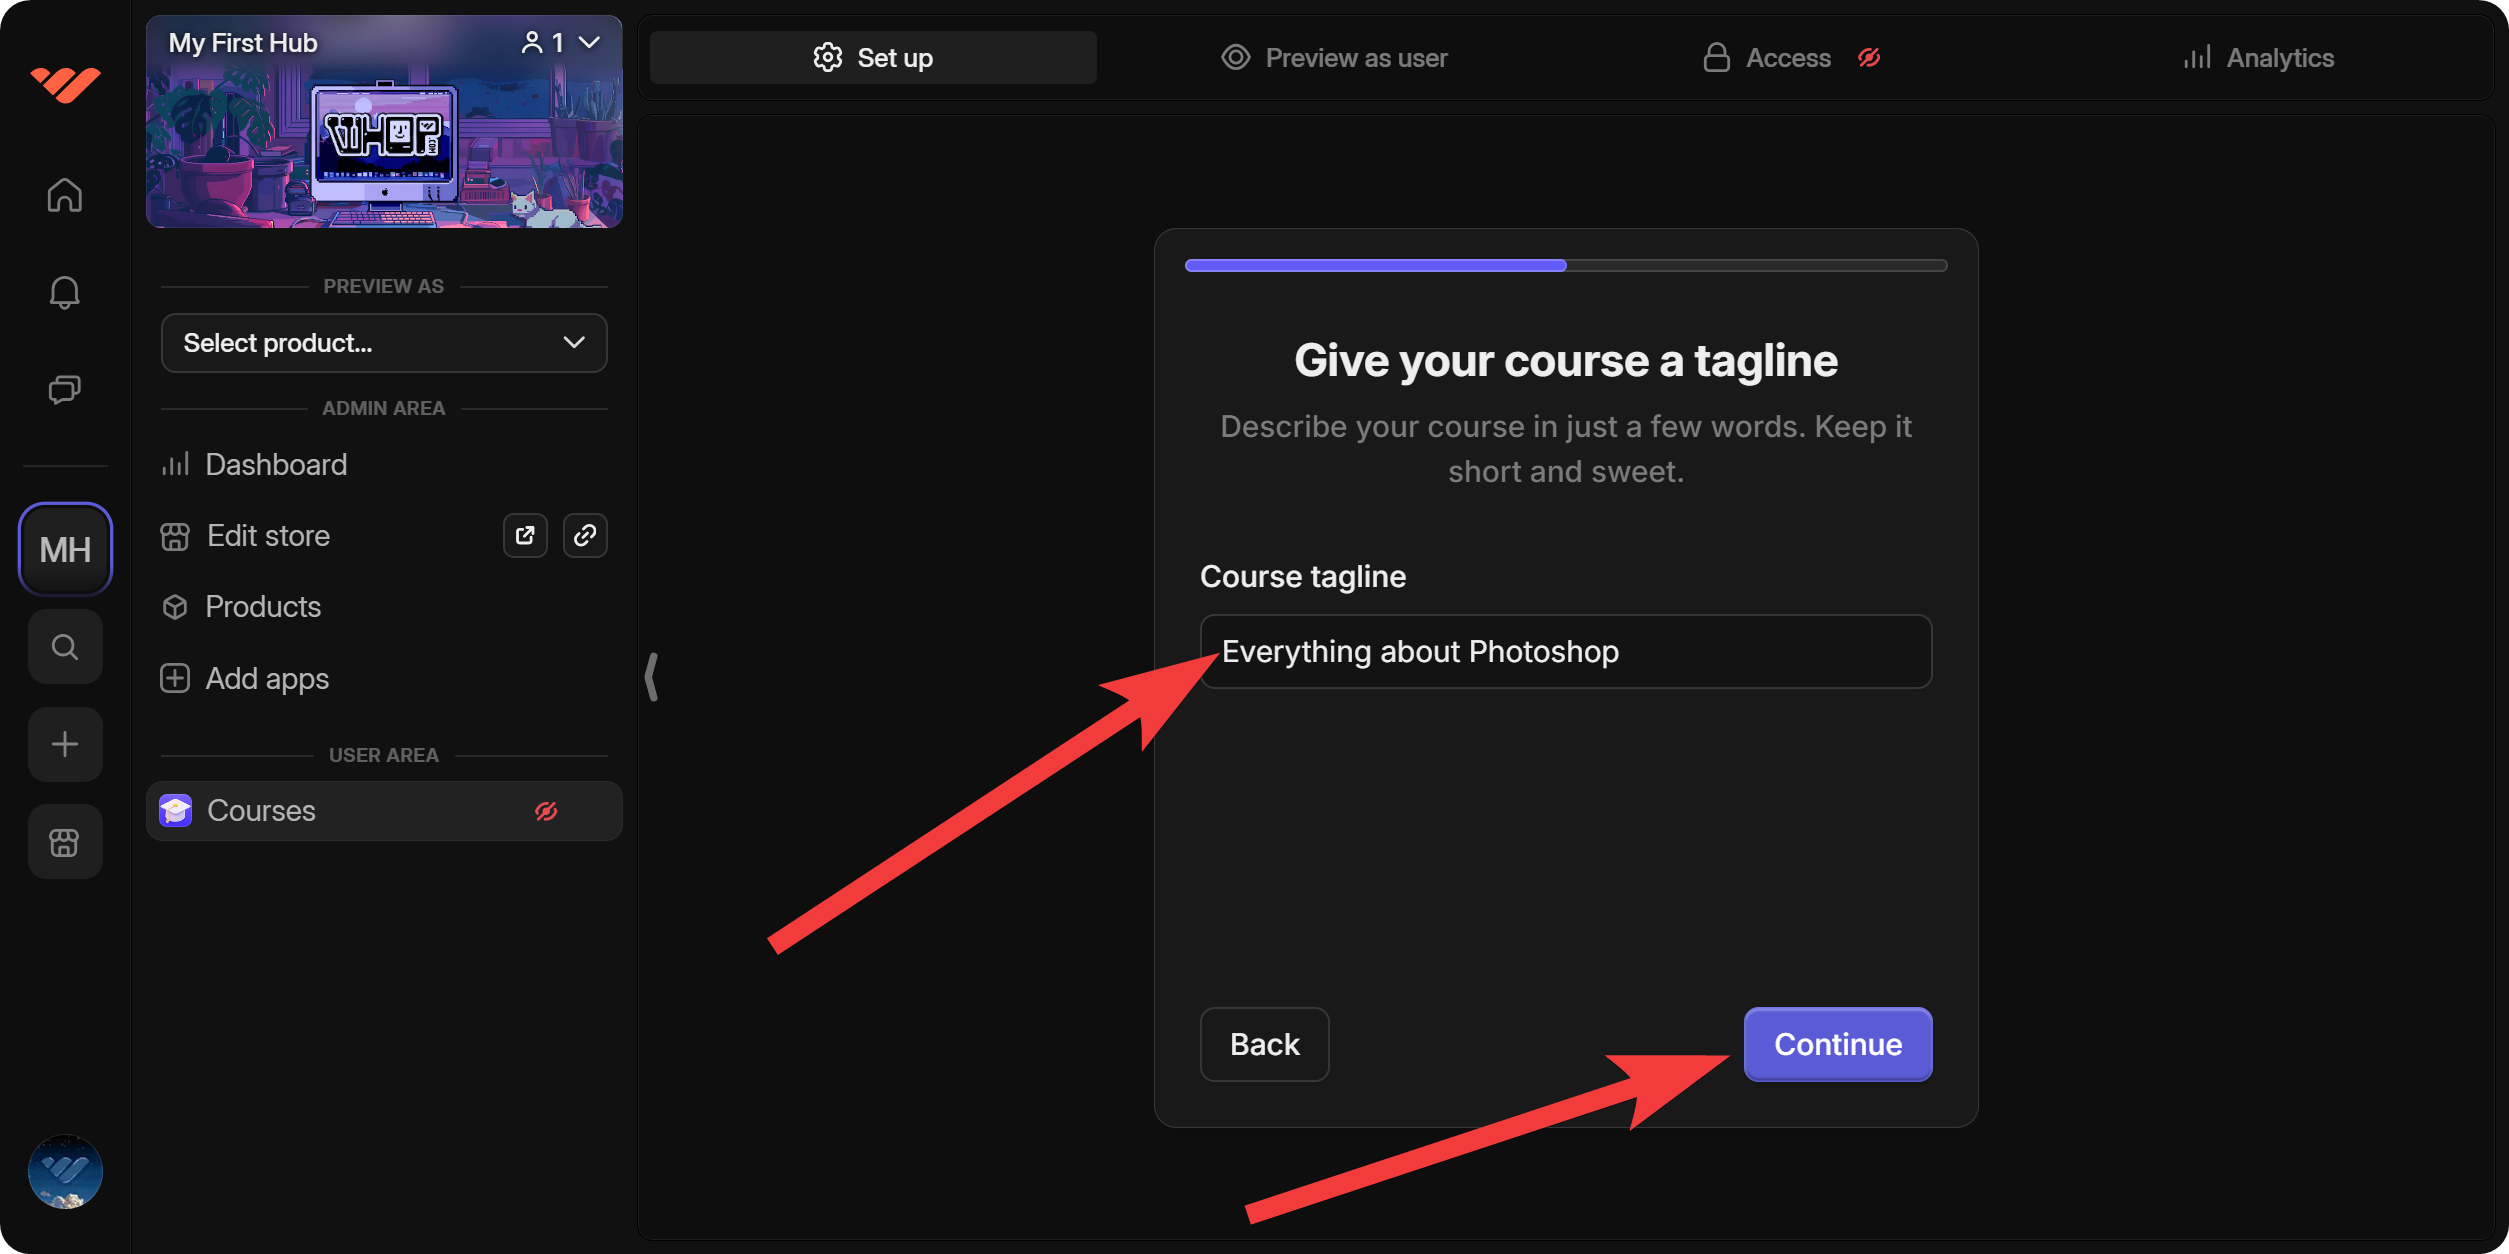
The third step will ask you for the tagline of your course. Here, you should try to explain your course with a few words. You can change the tagline any time you want. After you’re done with the tagline, click Continue to proceed.
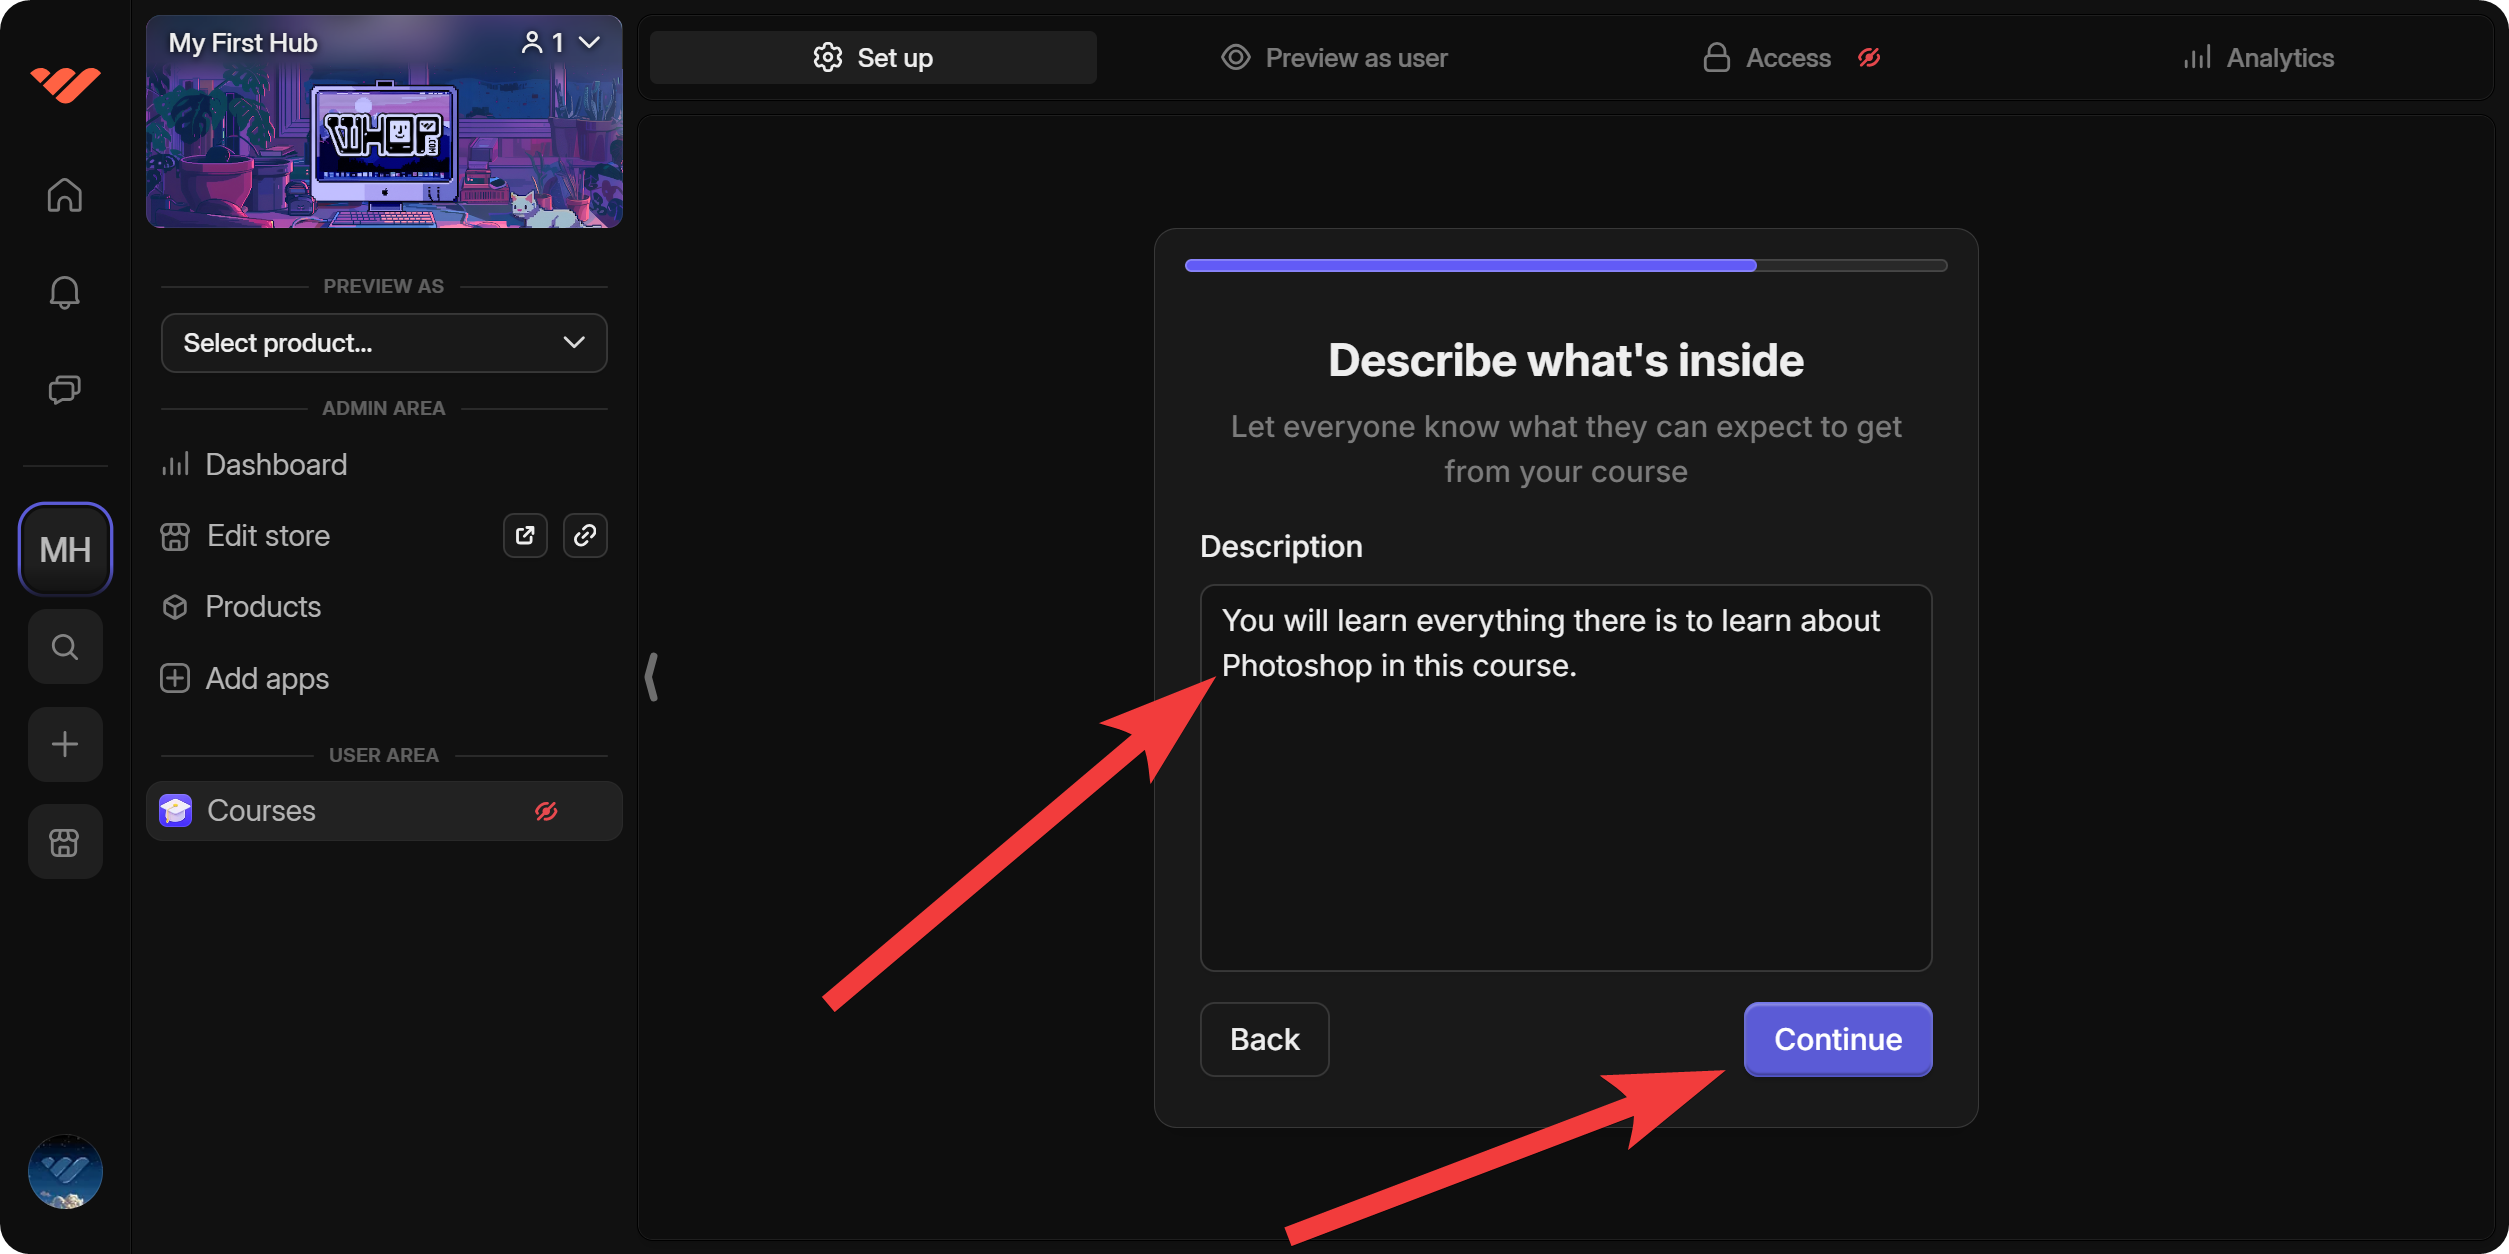
We’re getting close to the end. In the fourth step, you need to describe your course. Try to explain what the course provides and what outcome users should expect. This will be displayed on the main page of the course, so don’t make it too long – one to two paragraphs will do the job.
After you’re done, click the 'Continue' button to proceed to the final step.
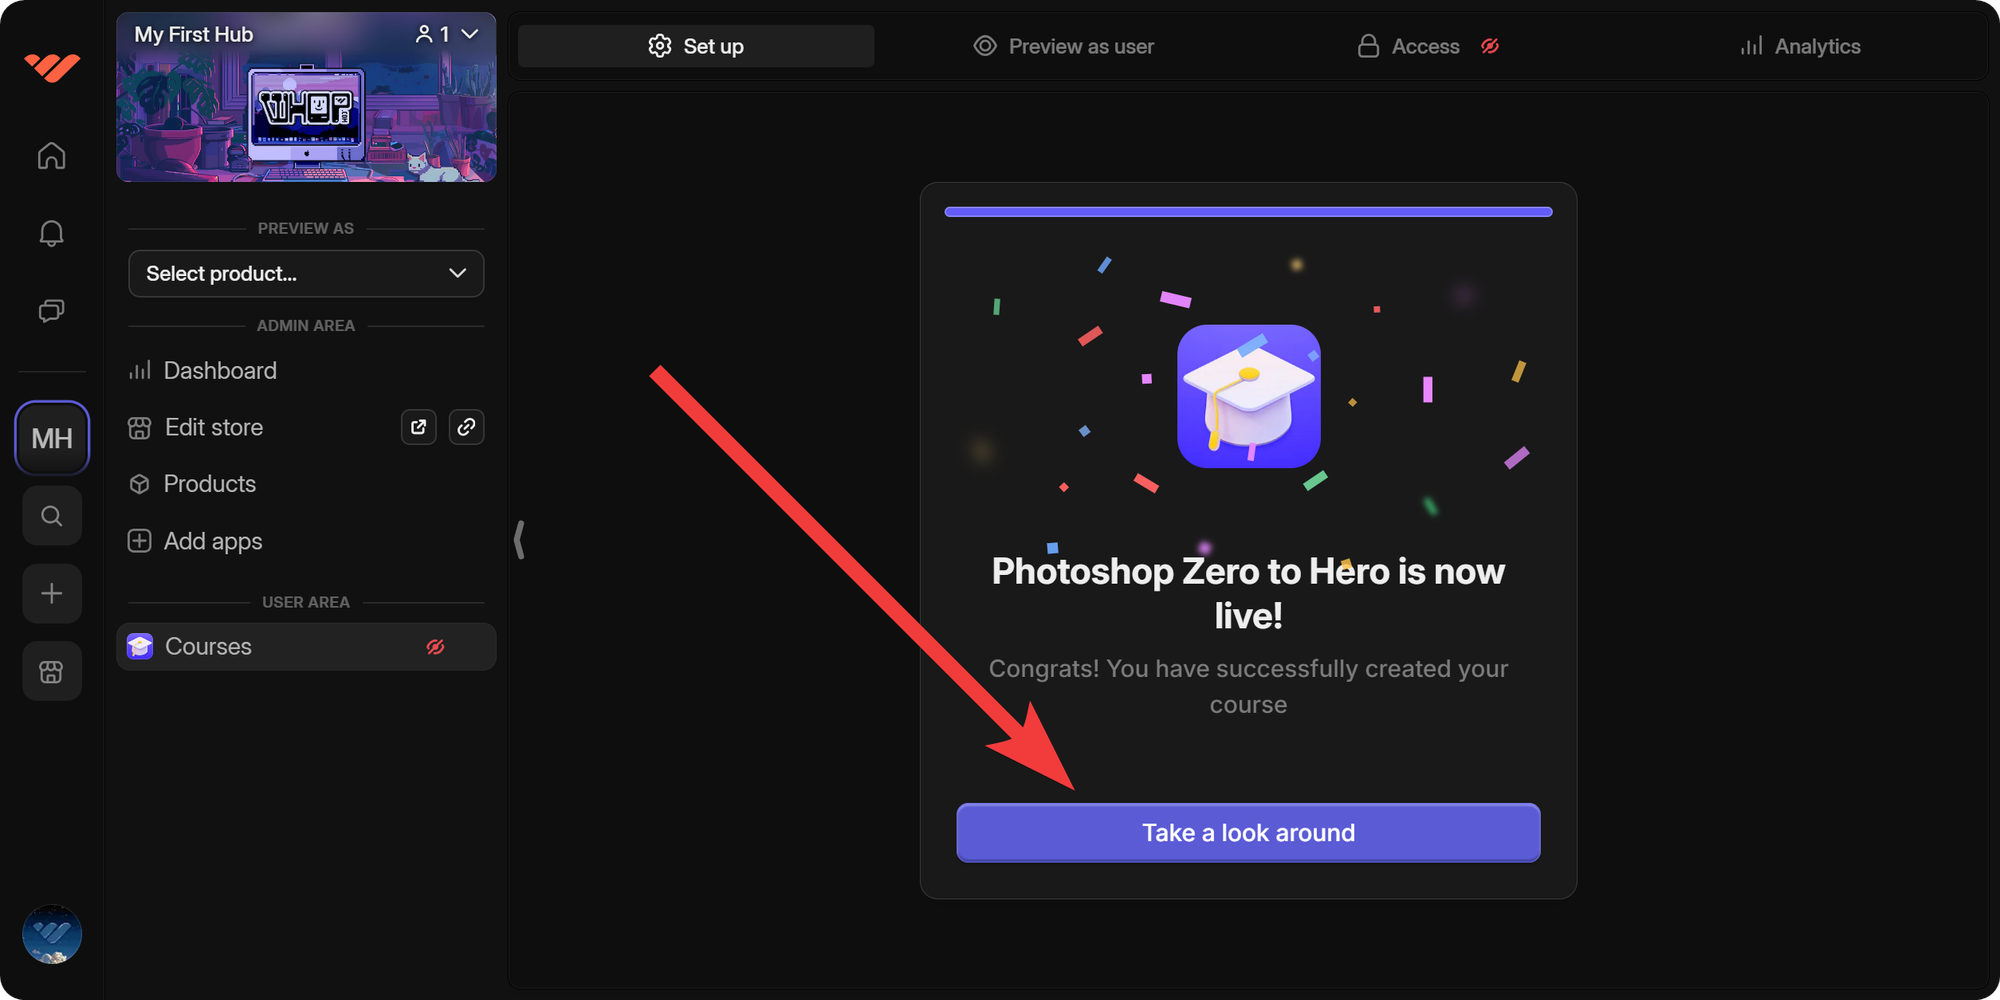
Congrats! Your course is now live. You can click the 'Take a look around' button to visit its main page.
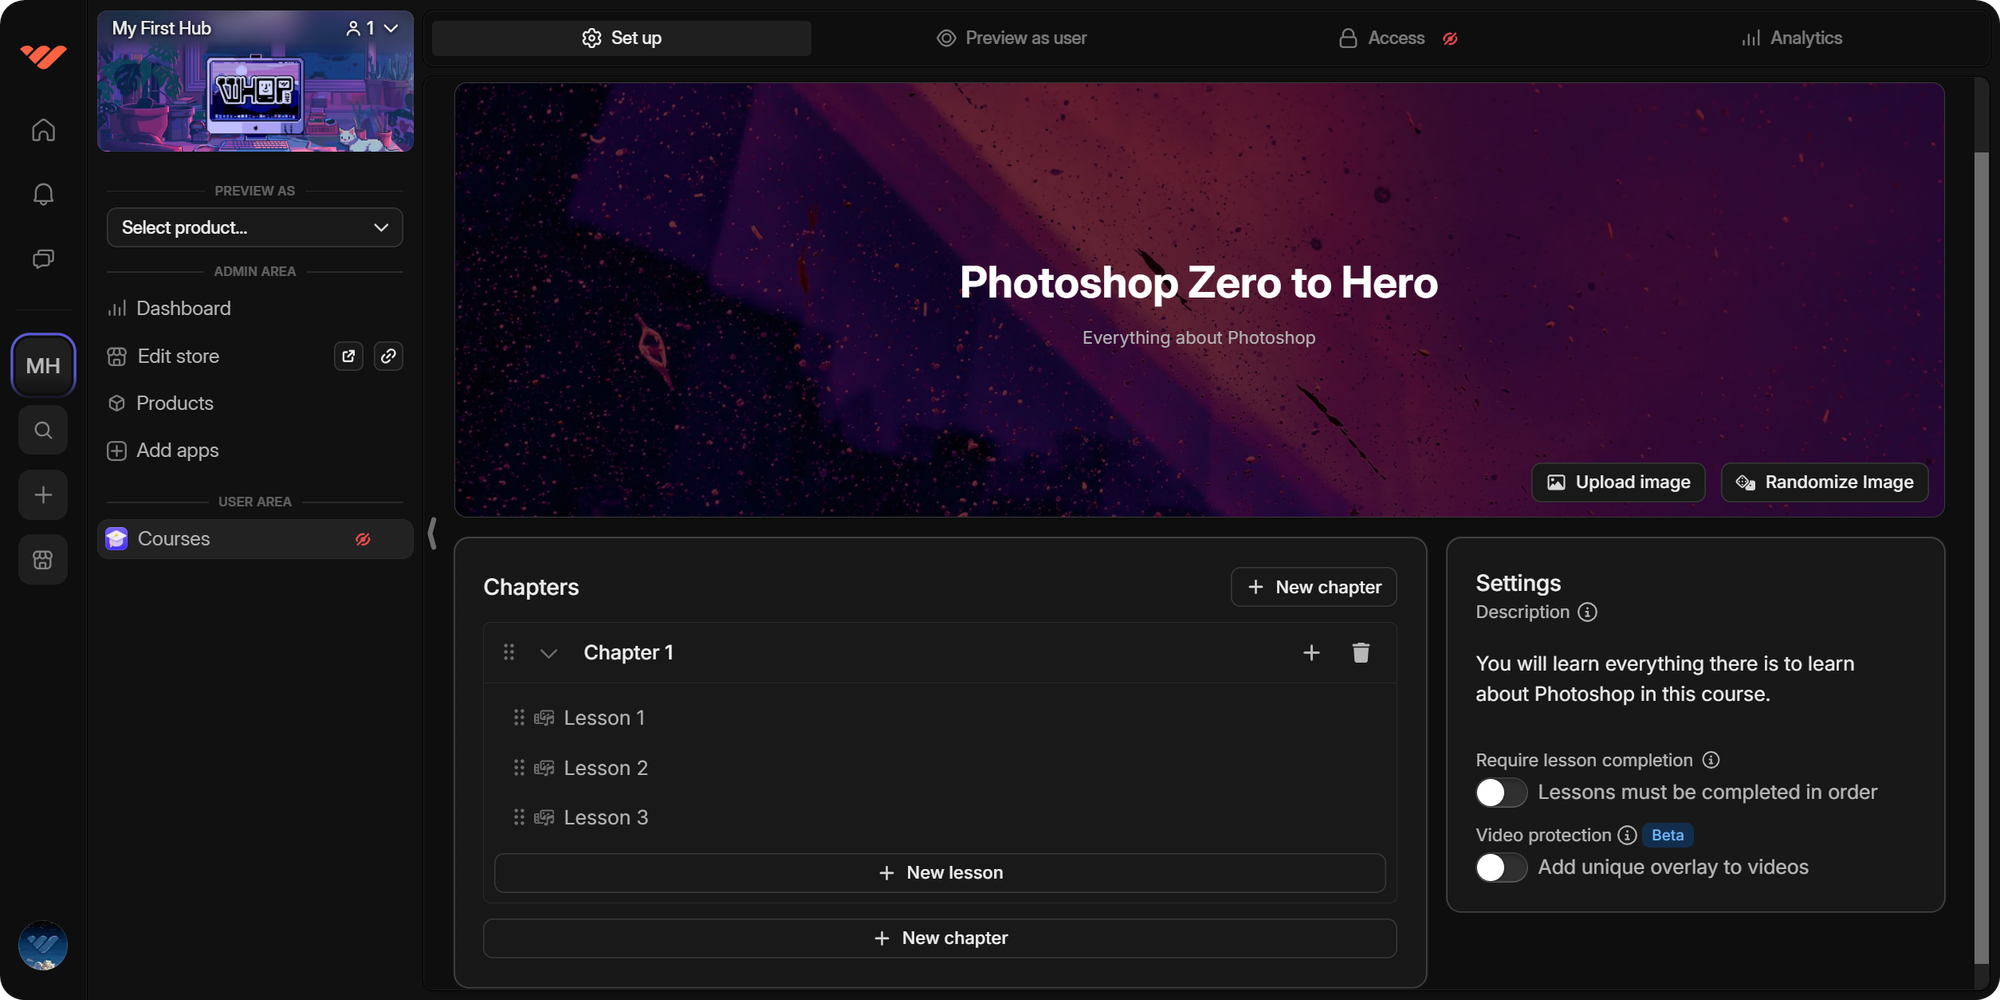
This is what the main page of your course looks like – but your job isn’t finished. You have just created the course, not its contents. Before learning how to add stuff to your course, let’s take a look at the main page first.
The first thing that will catch your attention is the banner. You can see the course name and tagline there – you can click on either of them to edit. You can also click on the 'Upload image' button to upload a custom banner image. The recommended ratio of the banner image is 3:1, and the maximum file size is 10MB. If you don’t have a design ready, you can see the default banners by clicking on the 'Randomize image' button right next to the 'Upload image' button.
Below the banner to the left, you can see the Chapters of your course. There, you can add new chapters and then add lessons inside them. Clicking on a chapter will allow you to rename it, while clicking on a lesson will direct you inside the lesson so you can add content and change its settings.
To the right of chapters and lessons, you can see the quick settings of the Courses app, including its description. Just like the name and the tagline of the course, the description can be edited by clicking on it. Below the description, you can see two toggle settings:
- Lessons must be completed in order: This setting ensures that users follow the lesson order, meaning that they won’t be able to jump from Lesson 1 to Lesson 6 without first completing lessons 2, 3, 4, and 5.
- Add unique overlay to videos: Your course is special, and there might be some people who try to download or even distribute it. Turning this setting on will add watermarks to your content to prevent this, and Whop will let you know if a user tries to bypass this setting.
Lastly, you might’ve noticed that there are four tabs at the top of your screen: Set up, Preview as user, Access, and Analytics. We just covered the Set up tab, which is the main page.
Now you know everything you need to start. Let’s move on to actually creating lessons within your Courses app and then examine the other tabs.
Pro Tip: Change the name of the Courses app by right-clicking on it and selecting the Rename option from the menu.
Creating Lessons in the Courses App
Now that you’ve created your course, let’s add some lessons to it. You can:
- Edit chapter names by clicking on them.
- Delete lessons by hovering over and clicking the trash bin icon.
- Add new chapters and lessons with the '+ New lesson/chapter' buttons.
But let’s not do those on the main page where your interface is limited. Instead, let’s click on one of the lessons that were automatically generated when you first added the Courses app to your whop. Clicking on a lesson will open the lesson edit screen, and you will have much more visual and functional freedom there.
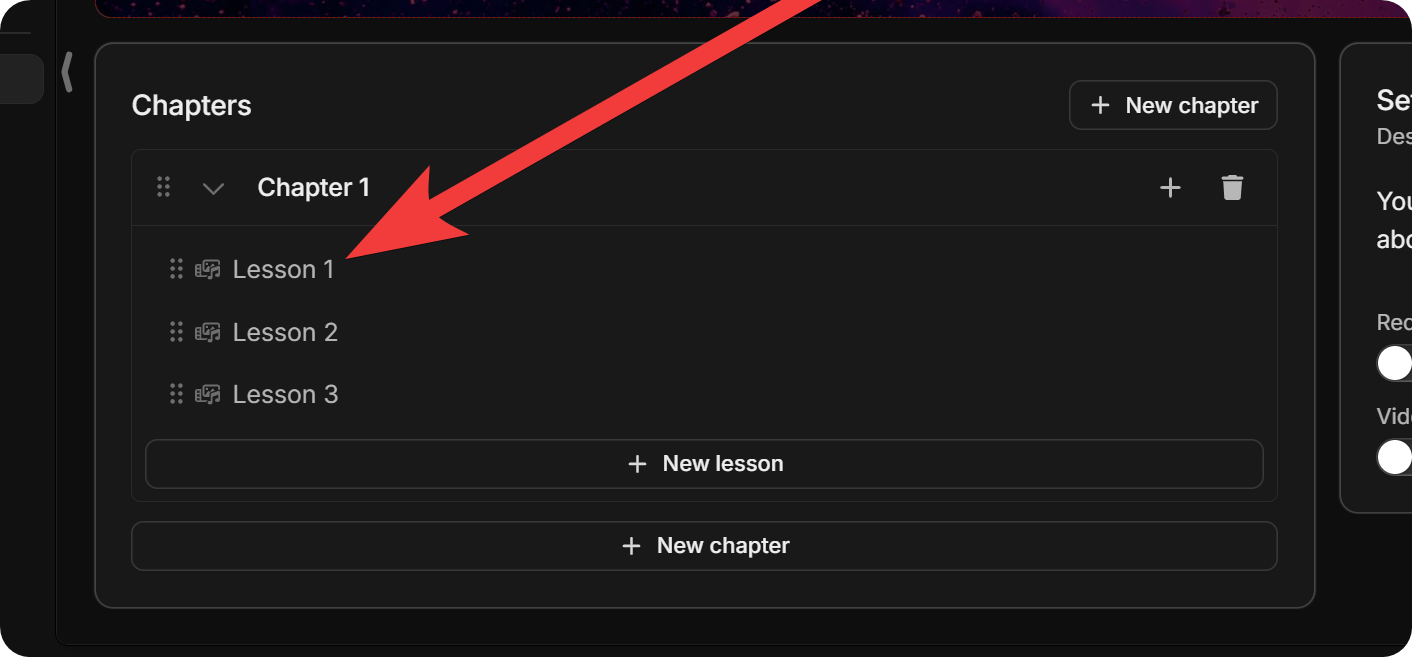
When you click on the lesson, you’ll be directed to the lesson page. Although the page’s main purpose is to edit lessons, you can edit the chapters here as well. The first three lessons that your Courses app automatically creates are empty multimedia lessons. Speaking of which, let’s remember the six types of lessons you can add to your course:
- Multimedia: Upload rich text, video, and files.
- Text: Upload rich text content.
- Video: Upload video content.
- PDF: Upload PDF files.
- Knowledge Check: Add a quiz for your members with no final grade.
- Quiz: Add a quiz for your members with a grade and a completion requirement.
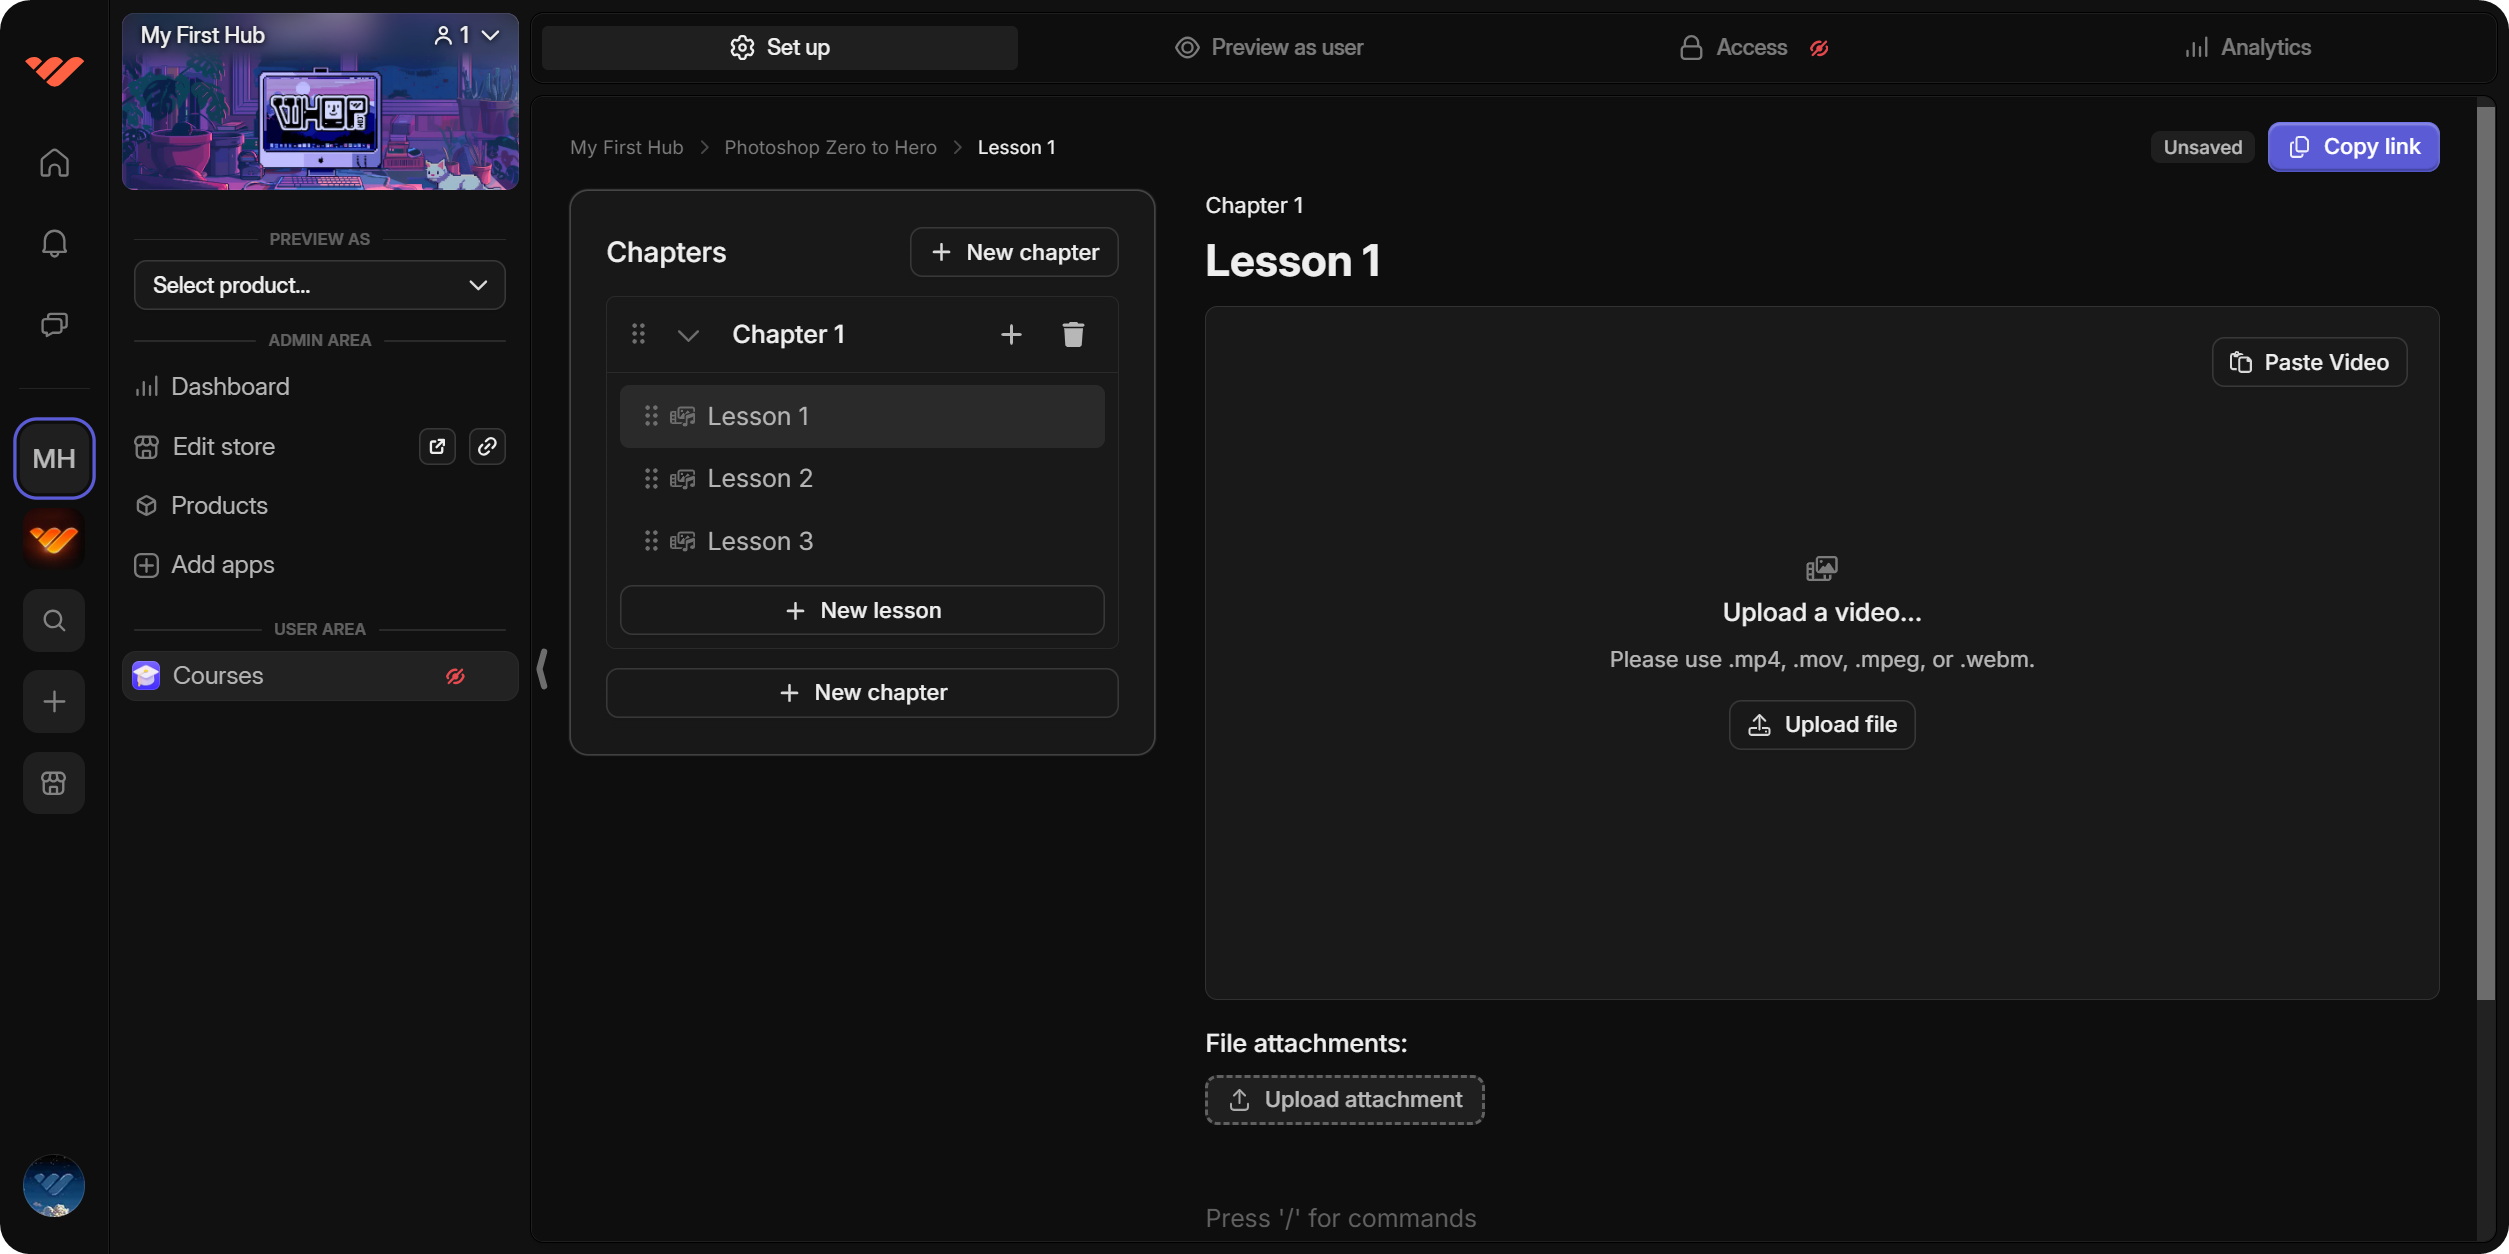
Now that you know the types of lessons, let’s examine what we see on the screen. On the left-hand side, we can see all the chapters and the lessons of the course. Clicking on the name of a chapter will allow you to change the name of it.
Clicking on a lesson will open its contents, which are the things you see on the right-hand side.
Since the three default lessons are multimedia lessons, you can see that we can add a video, upload file attachments, and use the '/' commands to add free-form text. If you want to delete a lesson, you can hover over it to see the trash bin icon and click it to delete the lesson.
Now you know how to use, add and delete lessons. Let’s delete the last two default multimedia lessons and add some content – a video and some text – to your first lesson.
Since you can deliver your lessons in many formats, you don’t have to conform to the conventional method of teaching the lesson with a video – you can use the video as a supplement for your text and vice versa.
Next, let’s add a Text lesson. Text lessons on your whop support markdown formatting, so you can make your text even more readable than plain text.
Alright, it's time to move on to the Video lessons. As their name suggests, Video lessons are conventional online course lessons that contain a single video and file attachments. You can upload a video by clicking on the 'Upload file' button on the right.
Most online and in-real-life courses assign reading material to their students in document, book, or paper form. You can do the same in your whop course by creating PDF lessons and uploading PDF files.
Just like adding a video file on the Video lessons, you can add a PDF file by clicking on the 'Upload File' button.
Of course, a course isn’t a course without some kind of test. Luckily, there are two types of tests you can add to your whop course.
Using the Knowledge Check lesson, you can put your students to the test. The difference between the Knowledge Check and Quiz lesson is that the former won’t return a grade, and users can pass the test no matter how they perform. There are four types of questions you can add to both lesson types:
- Multiple Choice: When you first create the Knowledge Check lesson, there will be a single default, multiple-choice question. You can add the question by typing in the 'Question text' input box, and add options under the 'Options' section. After adding all the options, click on the checkmark button next to the correct option.
- Select Multiple: This question type will essentially create a checkbox list, and you can select which options are correct and which ones are not.
- True False: As its name suggests, this question type requires you to write down a True or False question and add two default answers that cannot be changed: True and False.
- Short Answer: This question type will require you to write down the question and its answer. Since it’s a text answer, it will require users to write down the exact same text. For example, if the answer you write down is “By selecting the Lasso Tool,” the user will have to input exactly the right answer.
As we mentioned above, the Quiz lesson will perform almost the same as the Knowledge Check. The process of adding questions, the question types, and how they perform is exactly the same. The only difference is that users will have to either score a percentage or a specific number of correct answers, which you can determine using the topmost section in the Quiz lesson screen.
Preview as user tab
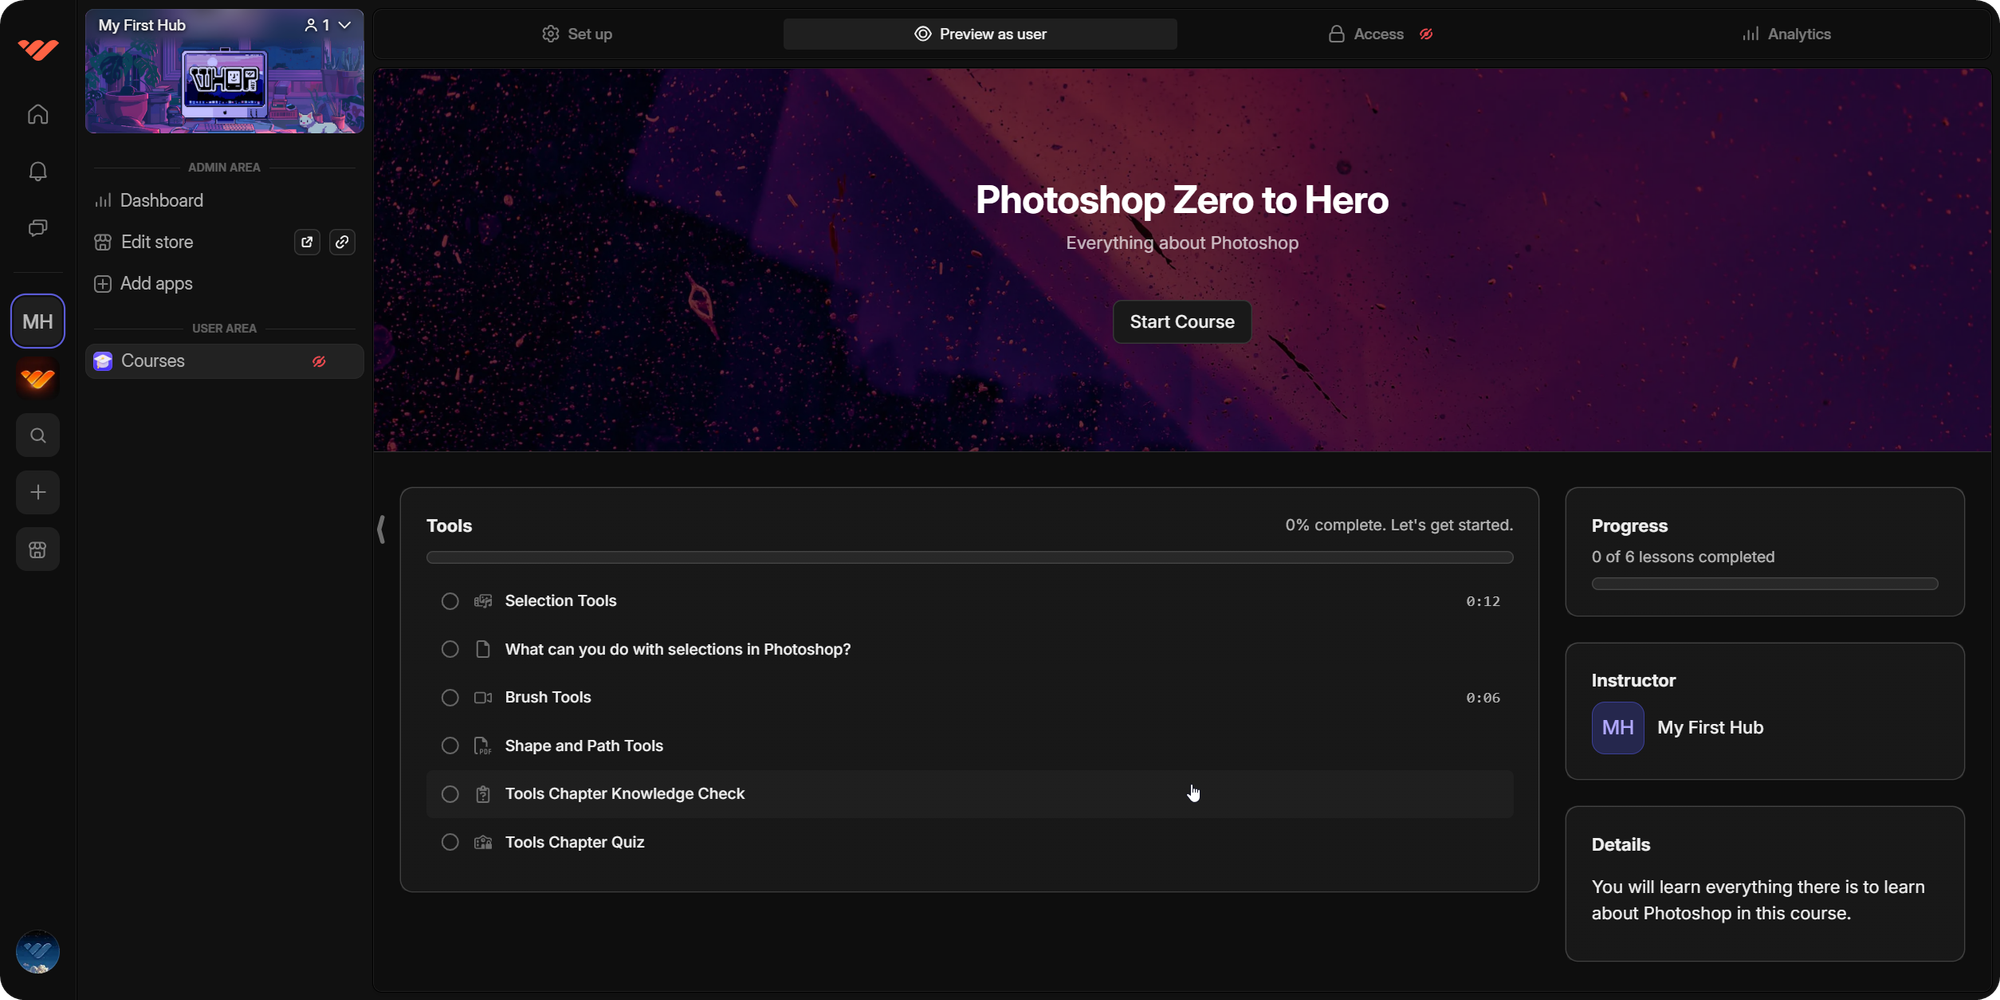
Now that you know everything you can do in the Set up section of the Courses app, let’s take a look at what the Preview as user tab is. You can probably guess thanks to its self-explanatory name.
After you set up the chapters and lessons, you can visit the Preview as user tab to see how a regular user will interact with your course.
Access tab
Inside the Access tab, you can determine how users will be able to use the Courses app on your Whop. You have two options:
1. Free: This means anyone on the internet will be able to access your course.
2. Paid/Private: This means that only users with a certain product will be able to access your course.
If you don’t already have a product, you can create one in the Access tab by clicking on the 'Create Product' button and following the steps your Whop prompts you (as can be seen in the video below).
If you want to edit your product after you’ve created it, you can click on it in the products list in the Access tab to navigate to its settings.
Analytics tab
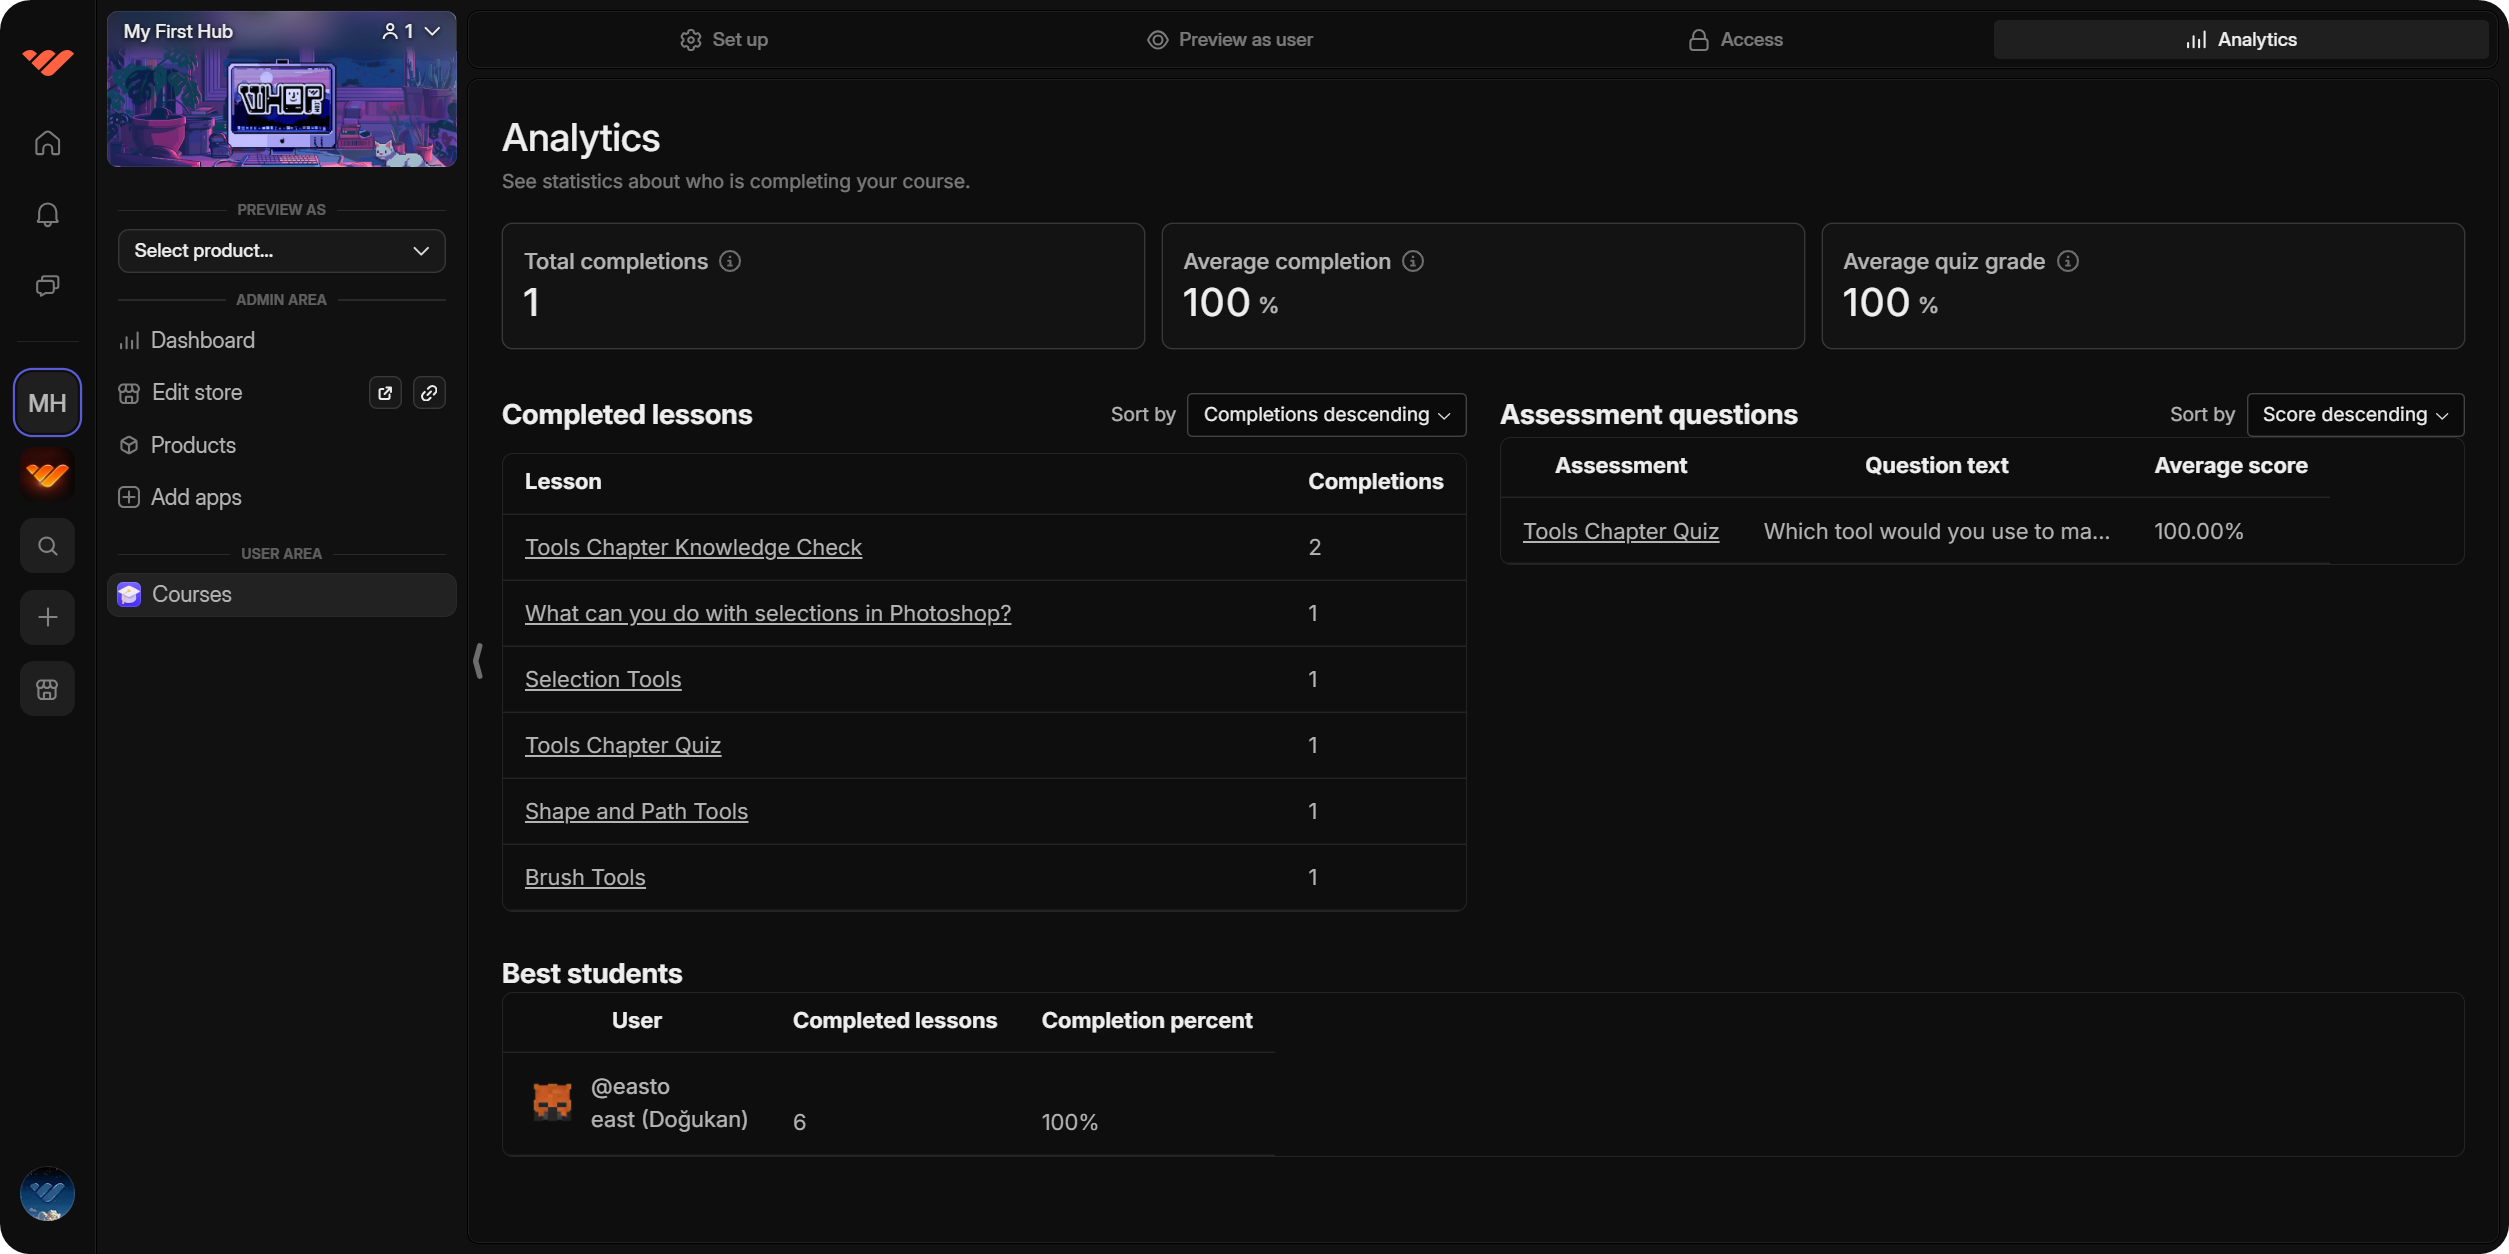
Inside the Analytics tab, you can see useful information about your course. This will allow you to gather data about how your course and your students perform. The analytics you can see in this tab are:
- Total Completions: The number of students who have completed your course.
- Average Completion: This is the average percent of your course that students complete.
- Average Quiz Grade: This is the average grade your students get on your quizzes (if your course has any).
- Completed Lessons: This is a list of all the lessons in your course with the number of their completions.
- Assessment Questions: This is a list of the assessment questions and their average score in your course.
- Best Students: This is a list of your best students based on their completed lesson count and completion percentage.
Sell Your Courses on Whop and Start Making Money Online
Creating a course is an amazing way to start selling access and earning money – and doing it on Whop makes the whole process even easier.
Since you now know everything there is to know about creating a course on your own whop, why not put it into practice and make your dream course a reality? Sign up to Whop today to create your course and start earning.


![The Best Online Course Platforms to Sell Your Course [2024]](/blog/content/images/size/w600/2024/06/Best-Online-Course-Platforms.webp)